Configure Commerce Connections And Enable Crypto Checkout
Want to get paid — by card, or even in crypto — right inside a chat? In this video, you'll connect your payout accounts, sync your store, and switch on cryptocurrency checkout. Let's set up your payments the right way.
Written By Fred Yalmeh
Last updated 27 days ago
Go to nexaera.com
1. Introduction
In this walkthrough, you'll connect the accounts that receive your revenue, link your product catalog, and turn on crypto payments. By the end, your agents will be ready to take money in every form. Let's dive in.

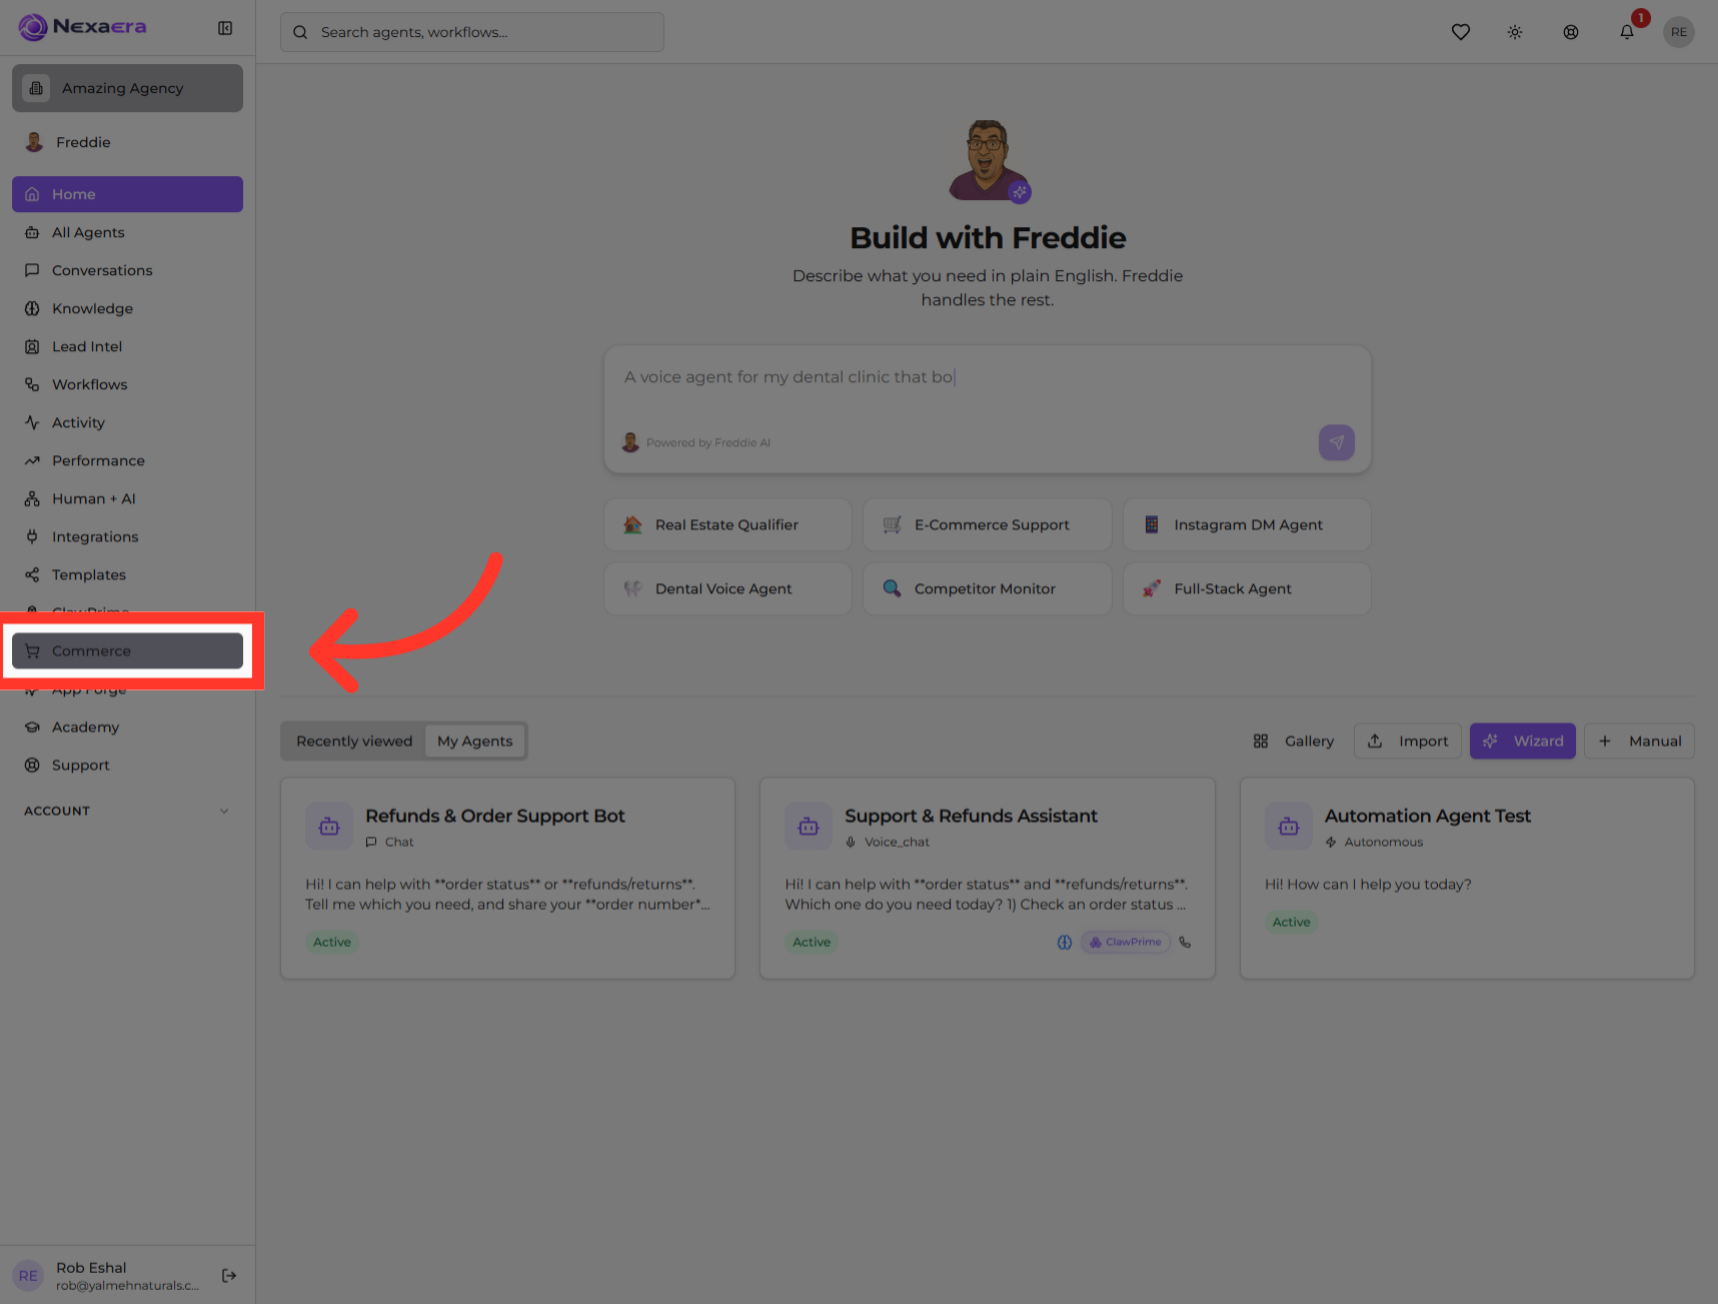
2. Access Commerce Section
On the left sidebar, click "Commerce." This opens your store management area.
3. Open Connections Settings
Along the top, click the "Connections" tab. This is where you link your payment accounts and your store.

4. Connect Payout Accounts
You'll see a simple three-part setup. Step one is "Connect payouts." This is where you link the accounts that actually receive your money — through Stripe, crypto, or both.

5. Import Products From Shopify
Step two is "Sync your catalog." Connect Shopify here to import your products, refresh pricing, and keep your inventory lined up automatically.

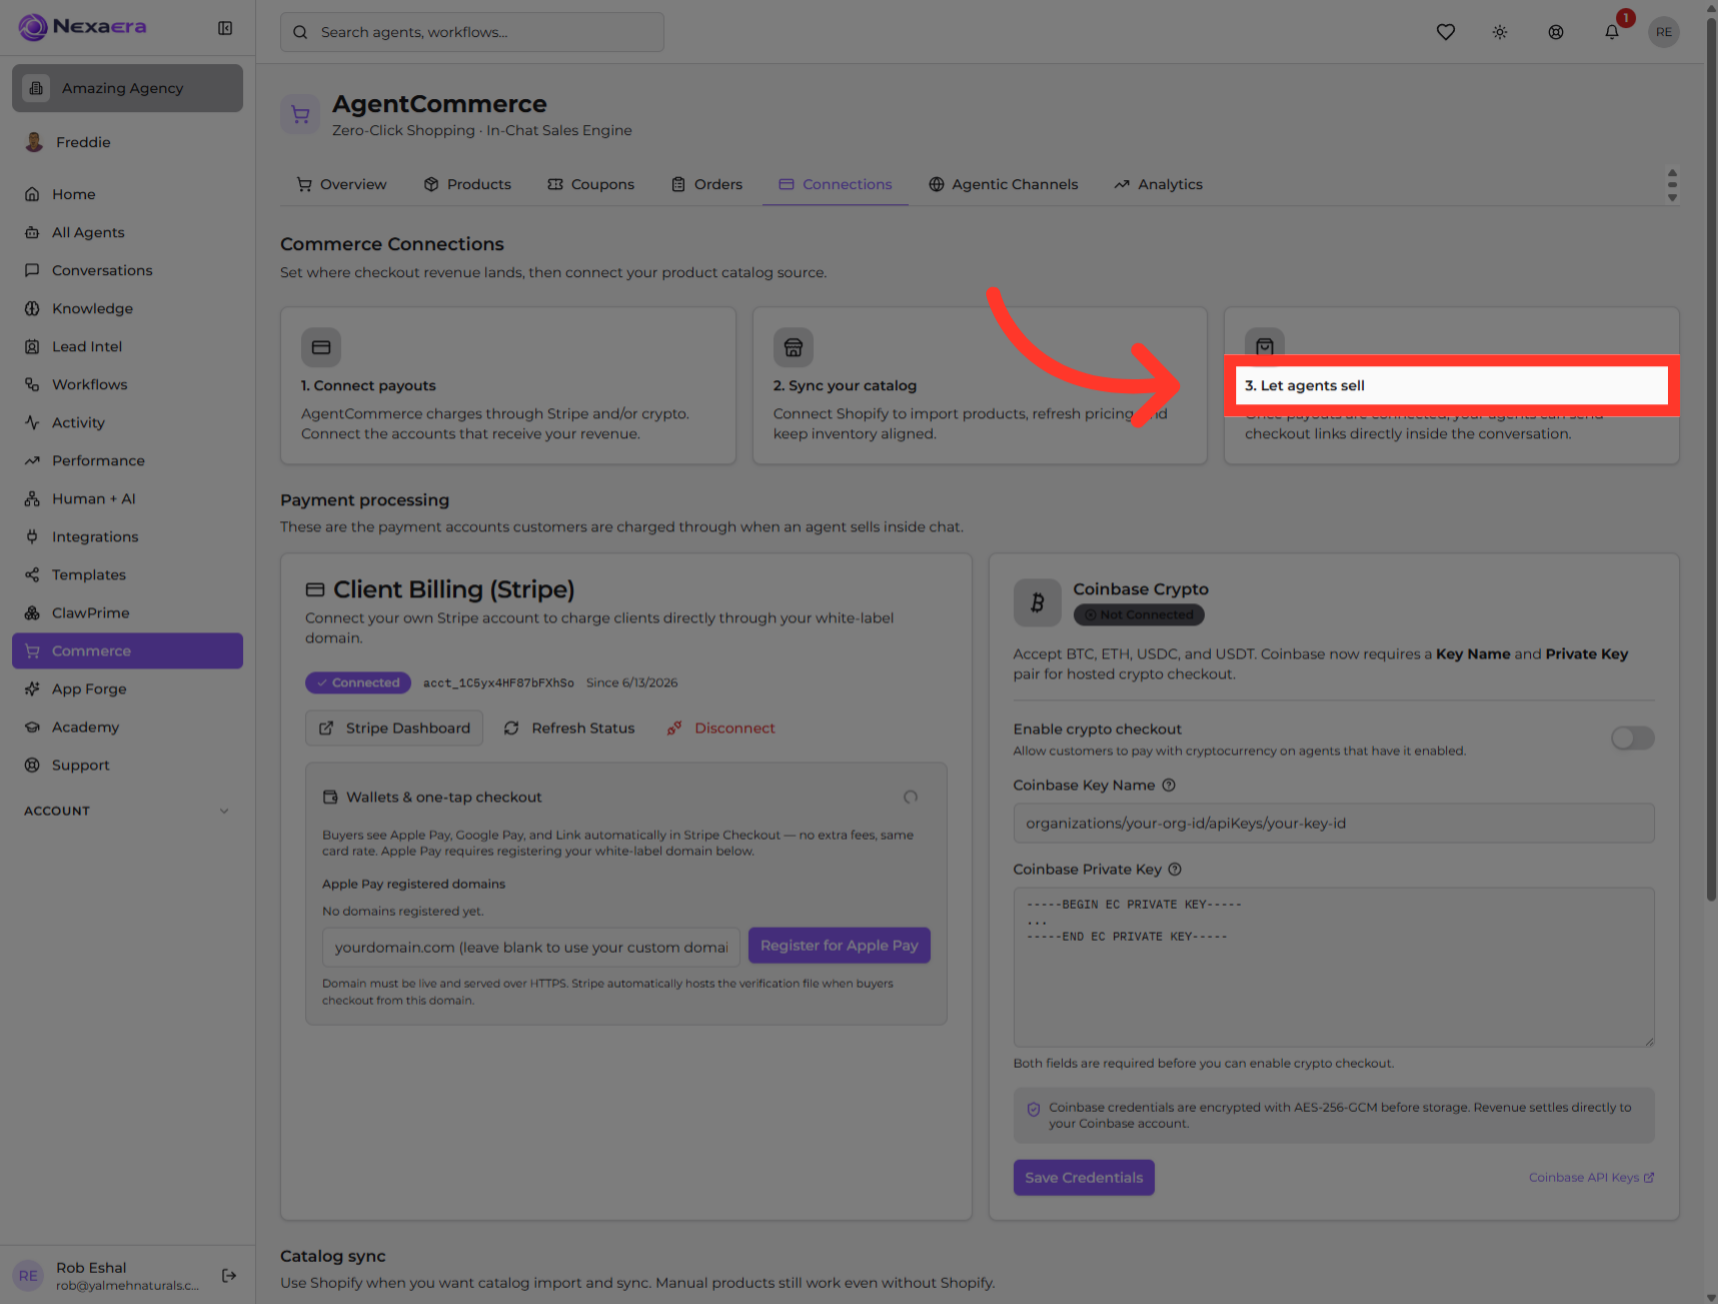
6. Enable Agent Sales
Step three is "Let agents sell." Once your payouts are connected, your agents can send checkout links right inside a conversation. That's the whole point.
7. Select Connected Account
Scroll down to payment processing. In the Stripe panel, you'll see your connected account marked "Connected." From here you can open the Stripe dashboard, refresh its status, or disconnect.

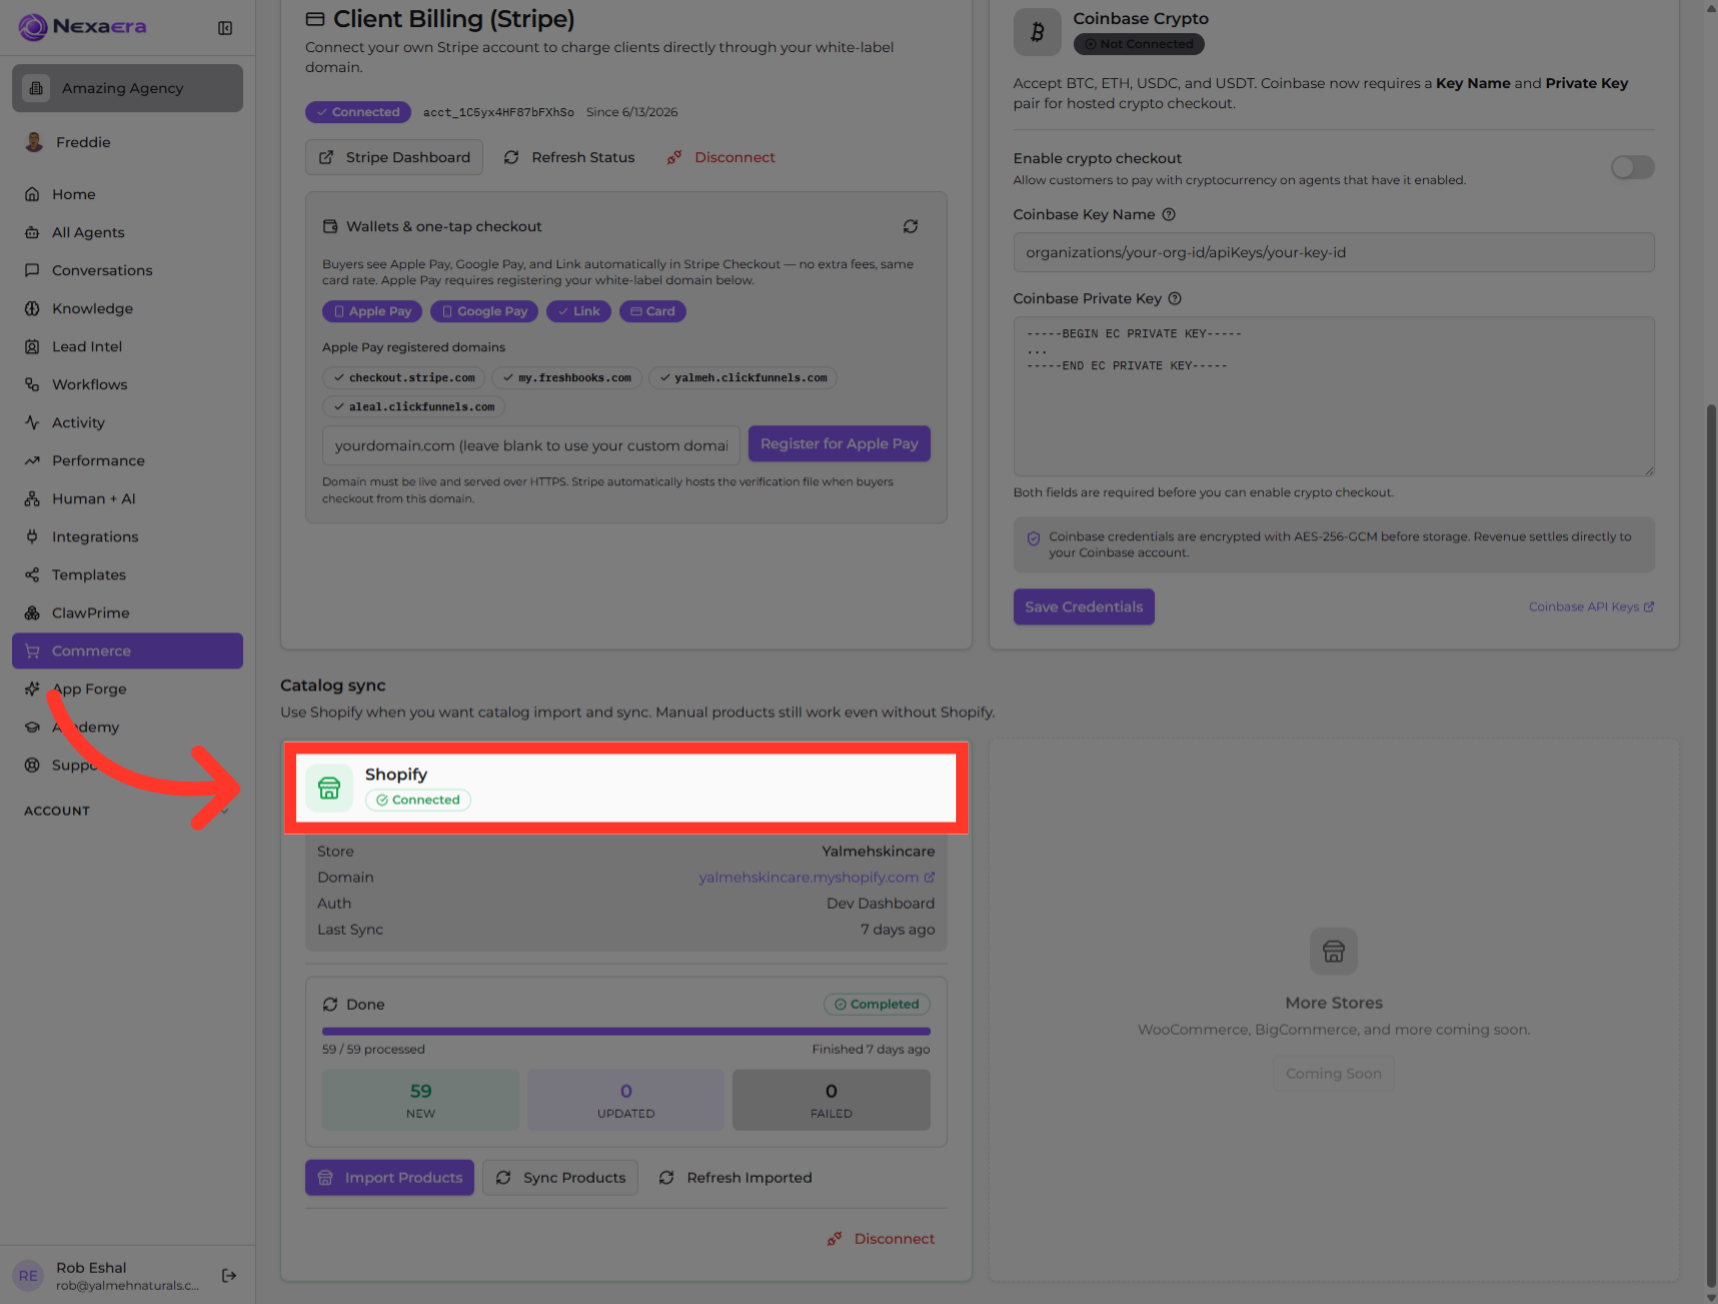
8. Confirm Shopify Connection
Under "Catalog sync," check your Shopify panel. When it reads "Connected," your store is linked. You can see the last sync time and import or refresh your products right here.
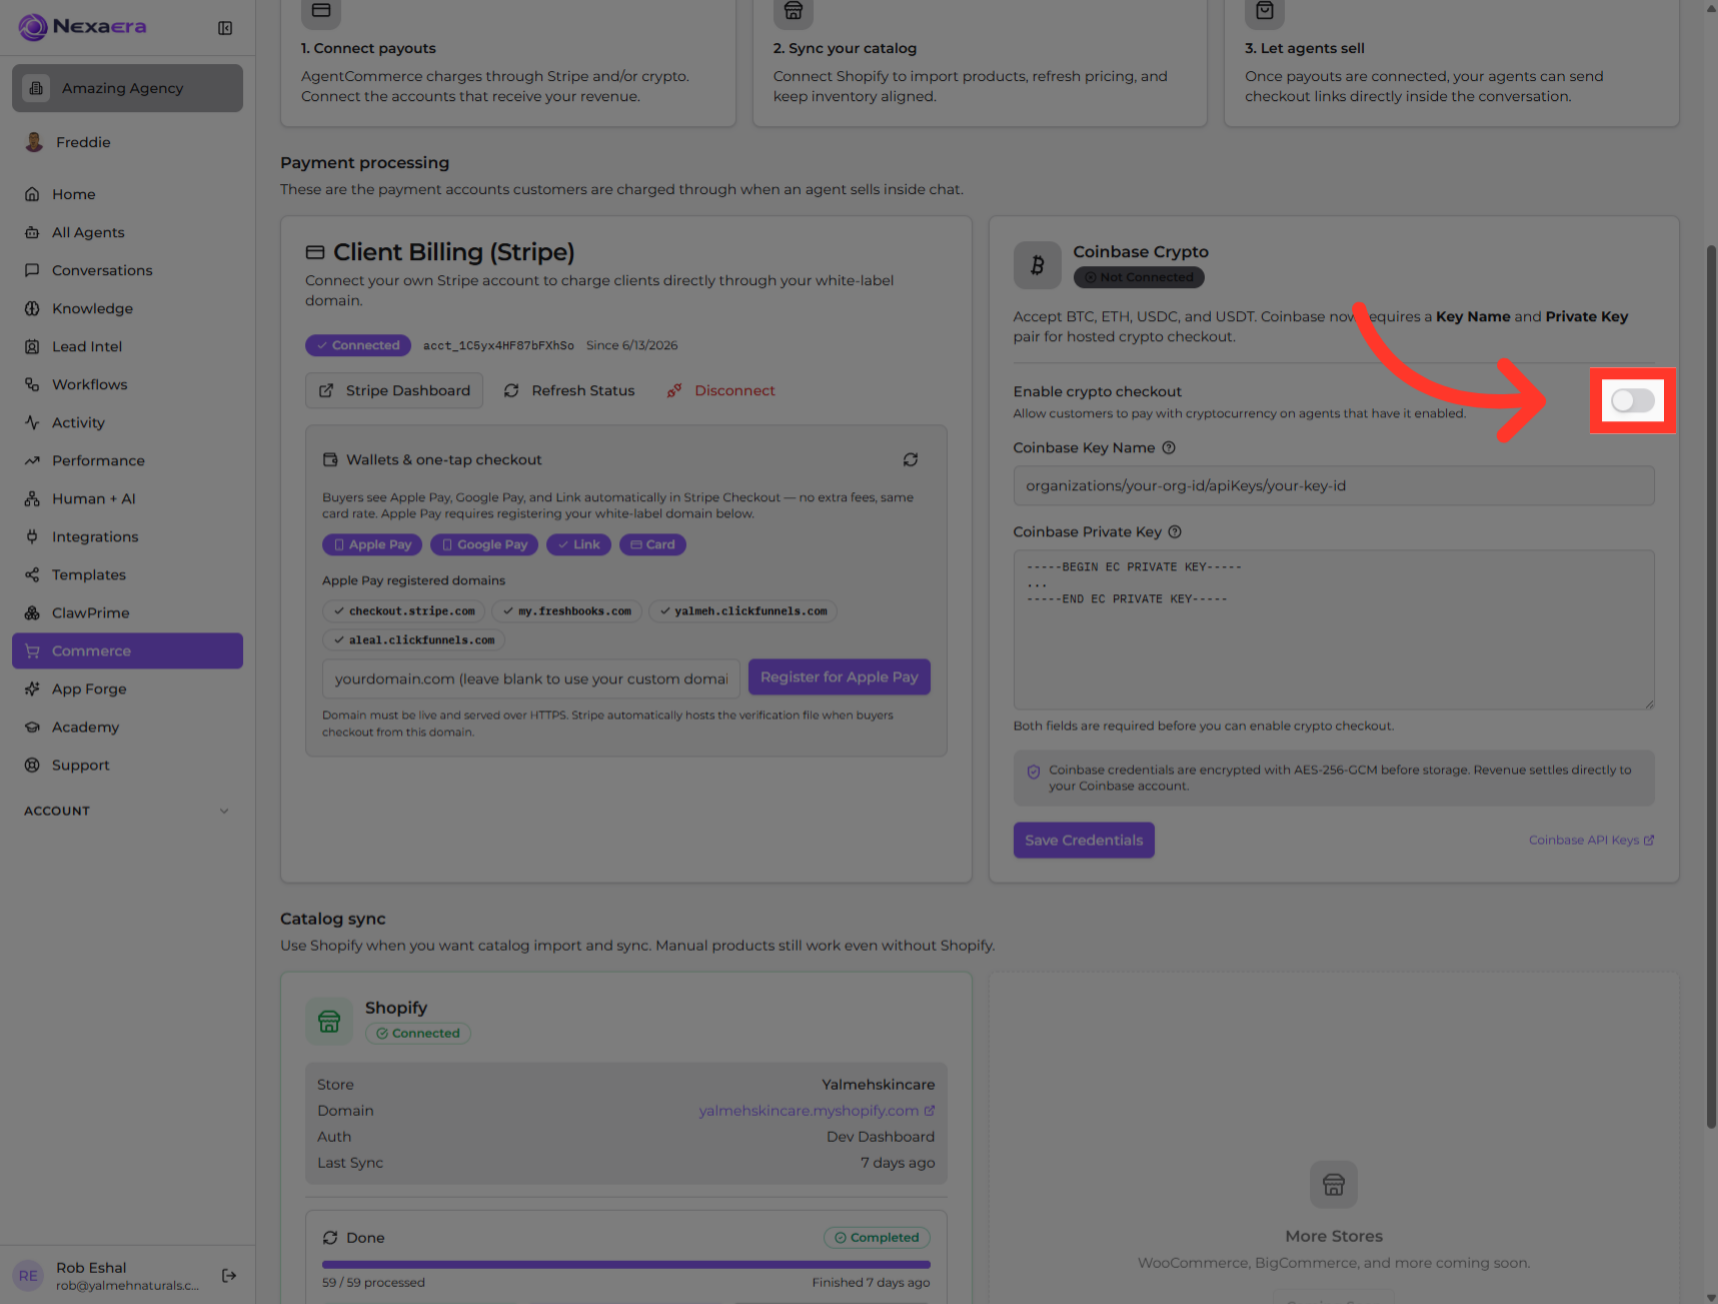
9. Activate Crypto Checkout
Now for the fun part. In the Coinbase Crypto panel, flip on "Enable crypto checkout." This lets customers pay with cryptocurrencies like Bitcoin, Ethereum, and stablecoins.
10. Access API Key Settings
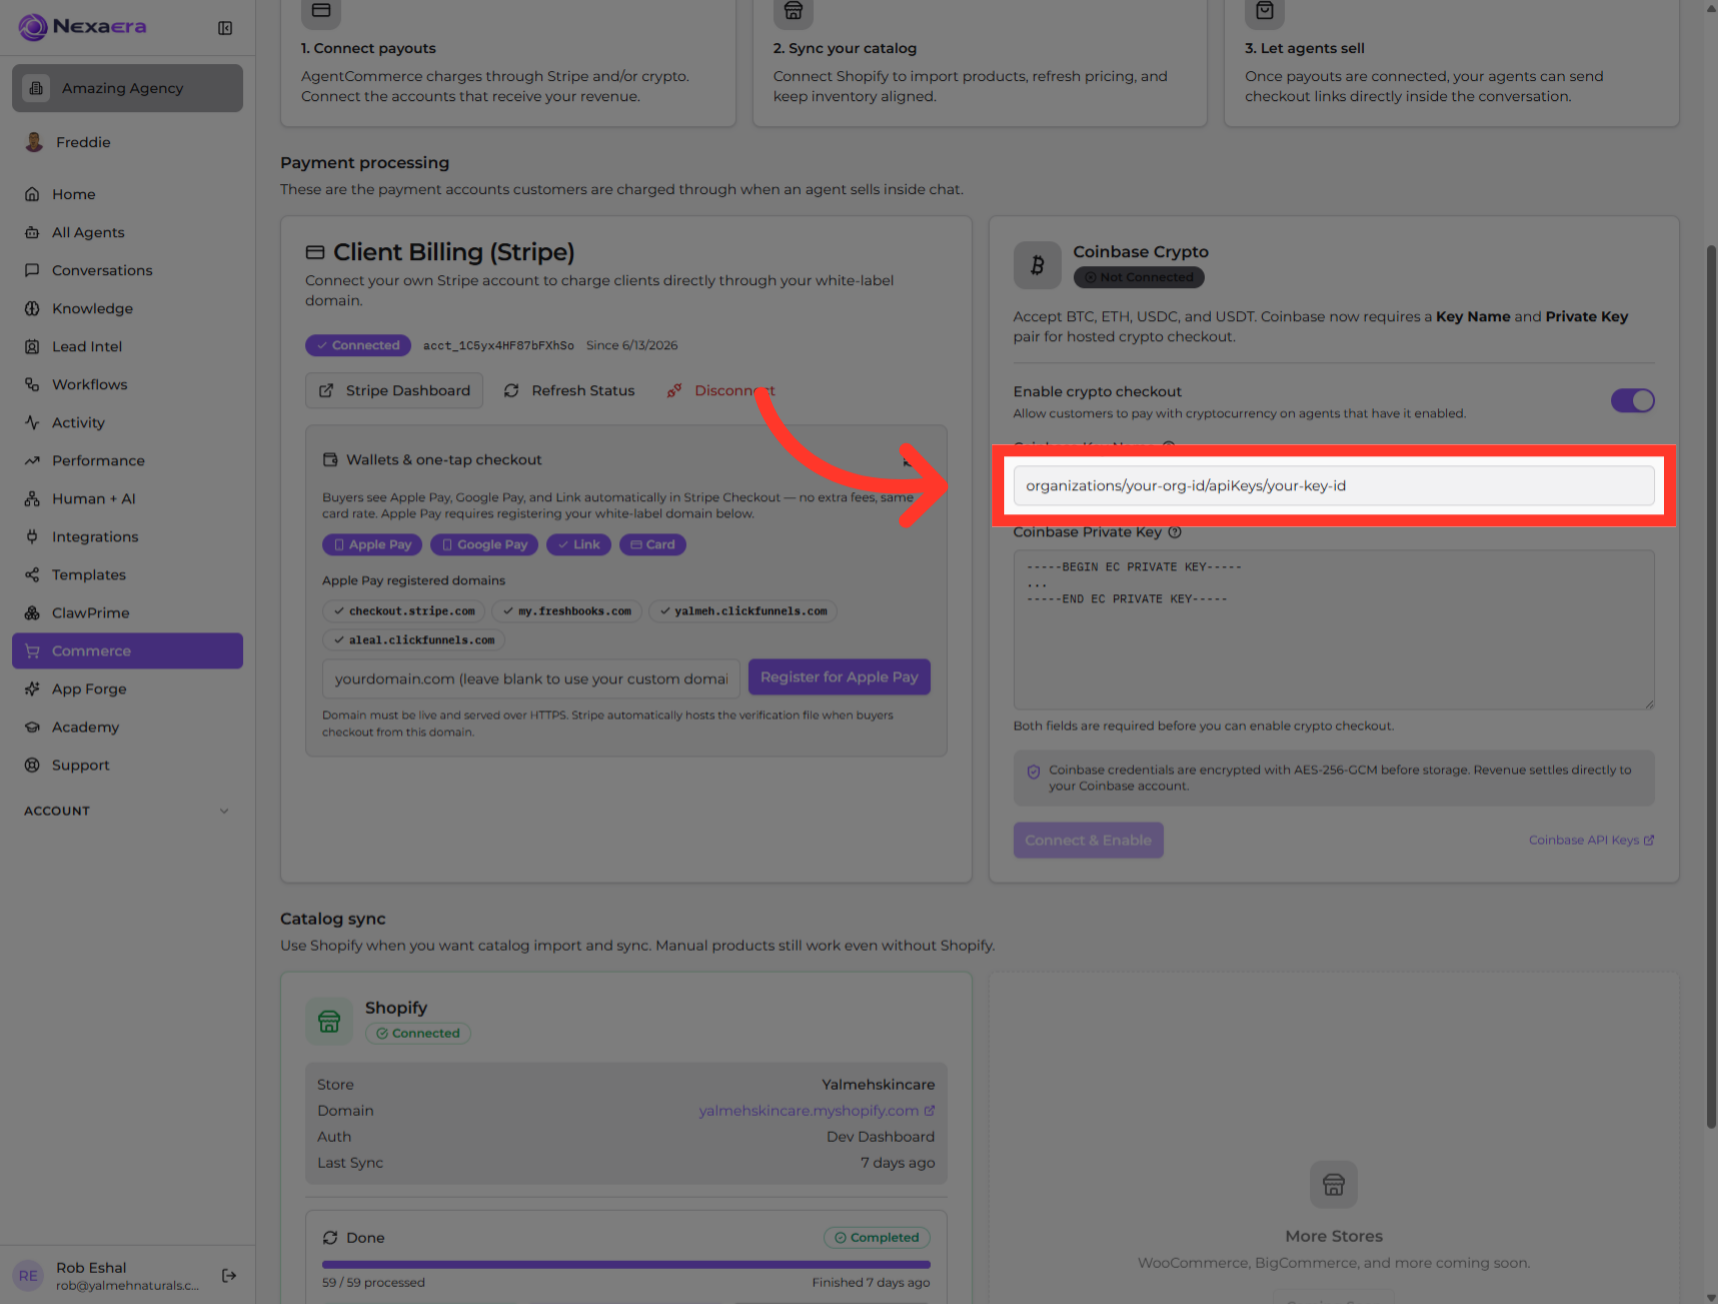
Crypto needs two credentials from Coinbase. First, paste your Coinbase Key Name into this field. You'll find it in your Coinbase API settings.
11. View Private Key Details
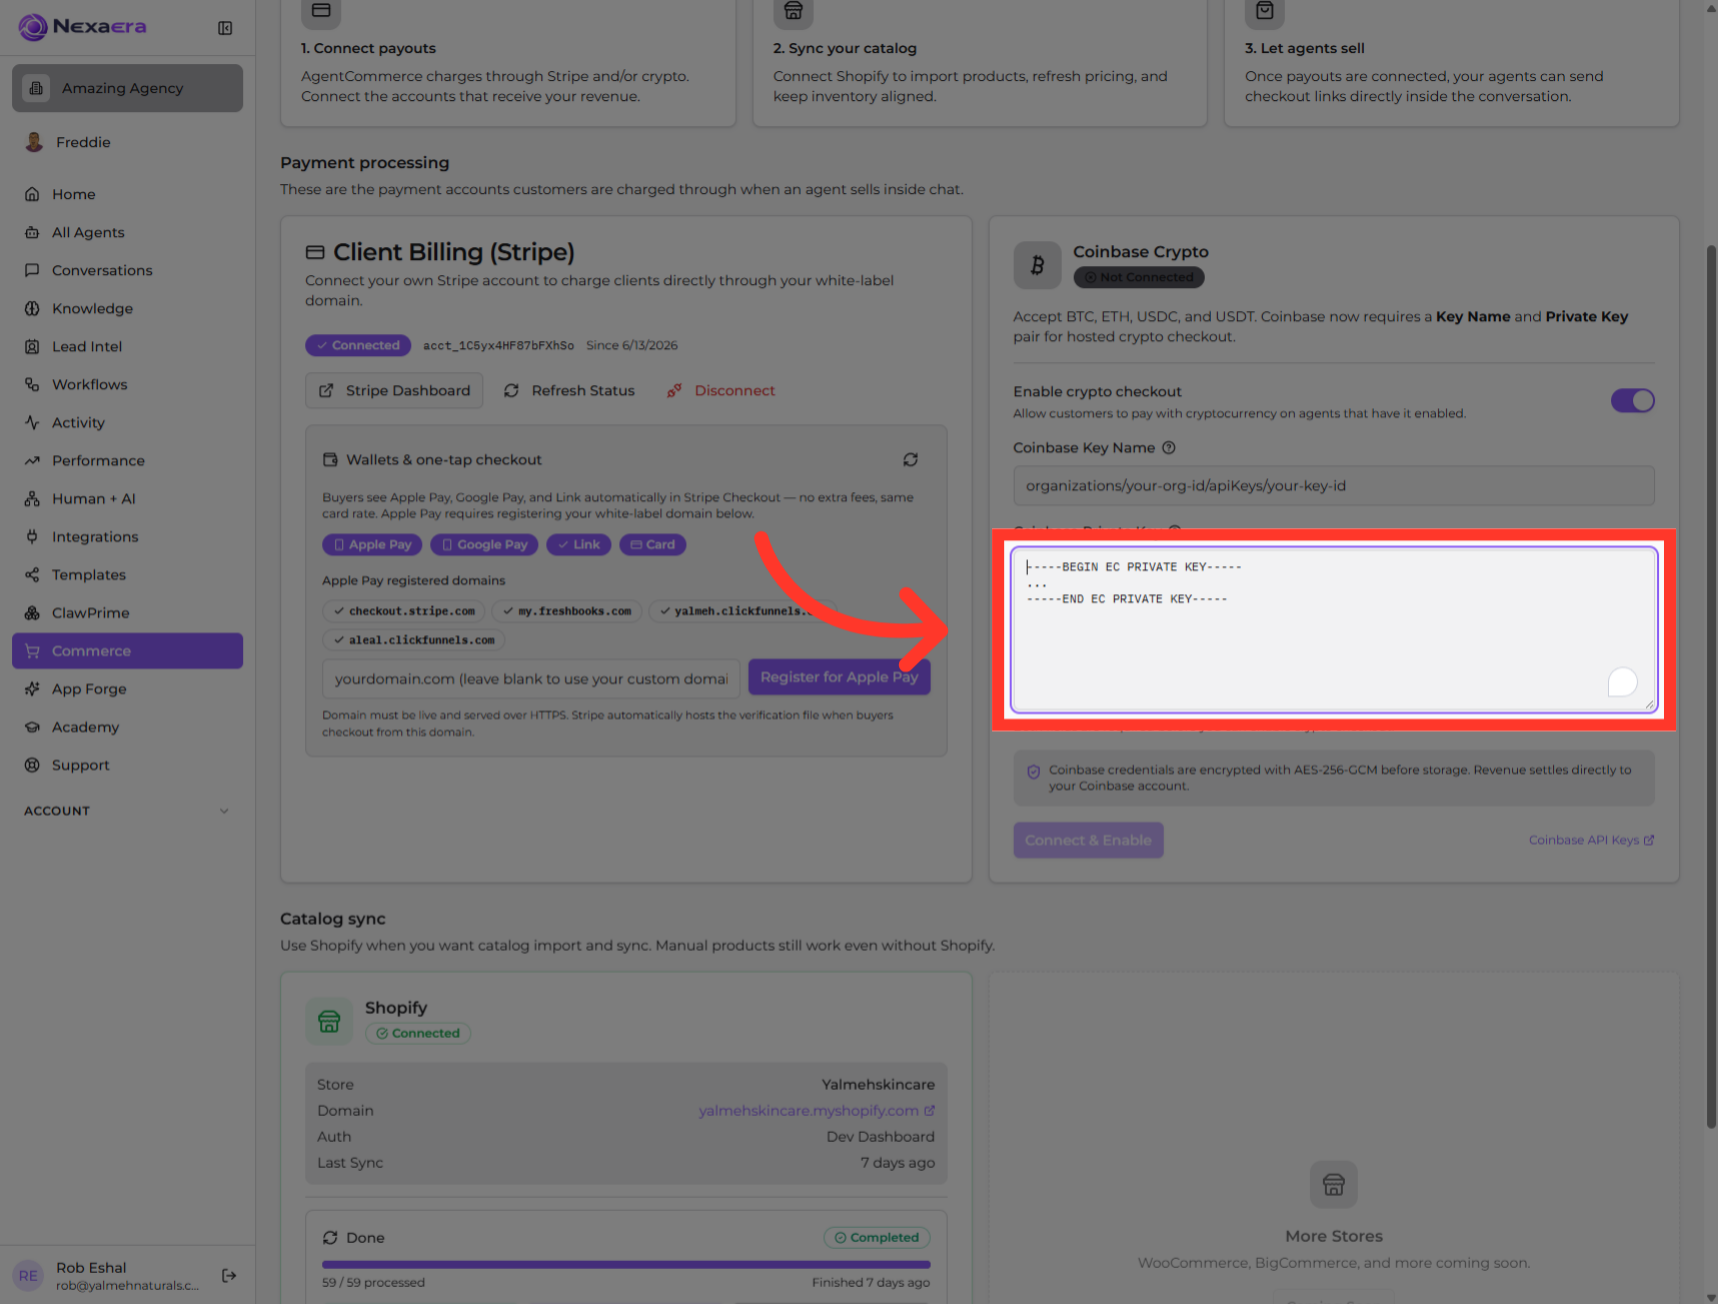
Then paste your private key into the second field, and save. Both are required to go live. Your credentials are encrypted before they're stored, and revenue settles straight to your Coinbase account.
And that's your payments fully wired up! Your payout accounts are connected, your store is synced, and customers can now pay by card or crypto. Your agents are ready to sell and get you paid. See you in the next one.
Still need help? Ask the team