Connect Shopify Store Integration With NexaEra Commerce
"Got a Shopify store? Let's plug your whole catalog straight into NexaEra so your agents can sell your real products. This one has a few more steps because we'll hop over to Shopify to create a quick custom app — but I'll walk you through every click. Stick with me and you'll have your store connected by the end."
Written By Fred Yalmeh
Last updated About 1 month ago
Go to www.nexaera.com
1. Introduction
"Here's what you'll be able to do by the end: create a Shopify developer app, grab its credentials, and connect it to NexaEra so your products, orders, and customers sync automatically. Grab a coffee — this is the big one, but it's worth it."
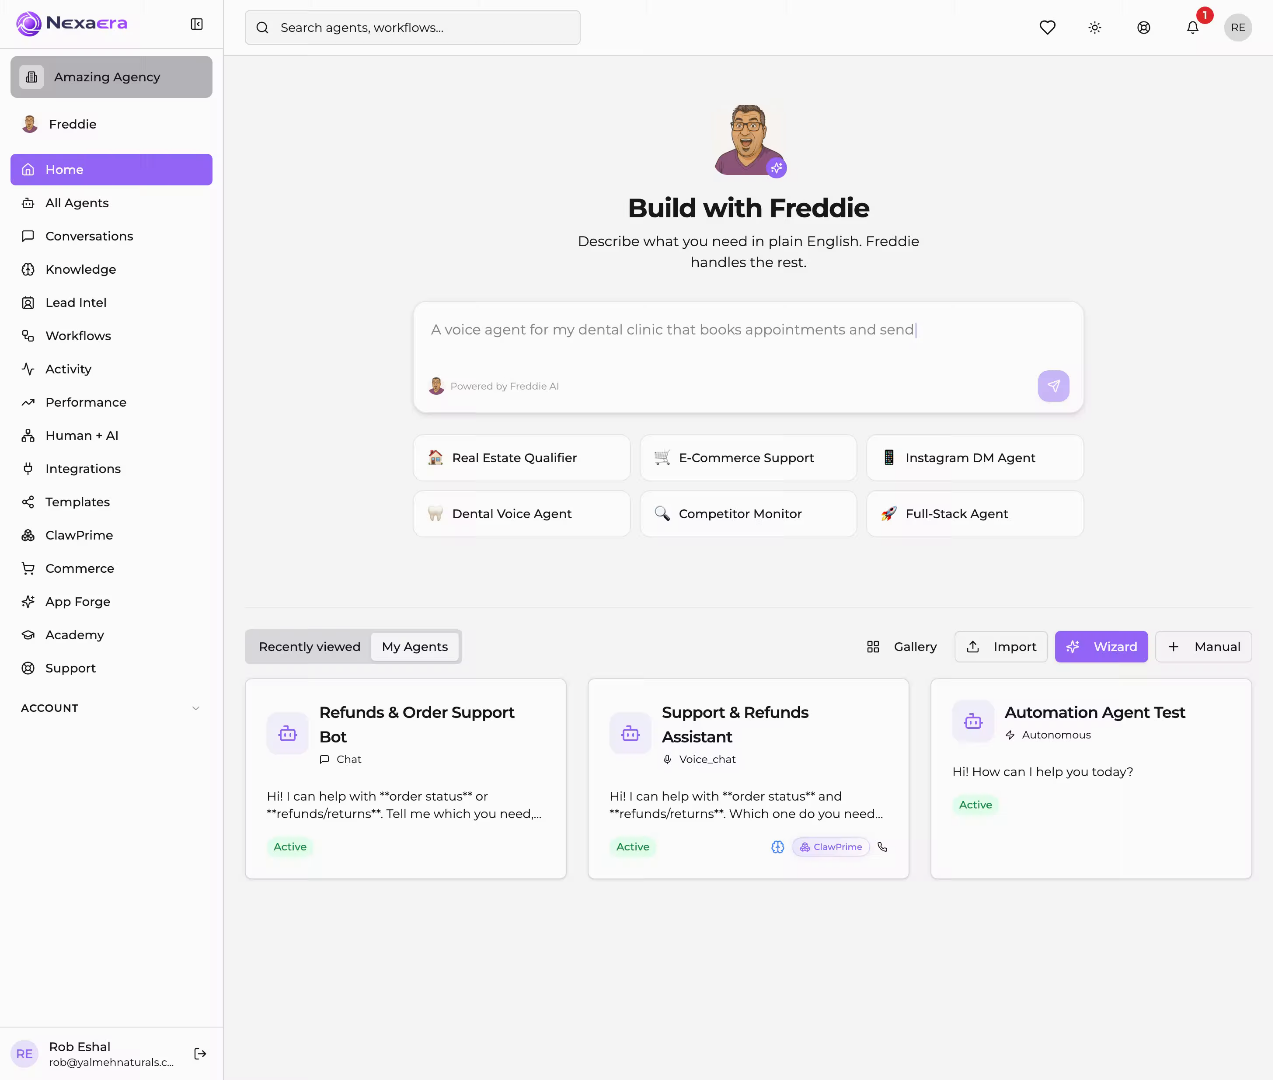
2. Access Commerce Section
"Start in NexaEra by clicking 'Commerce' in the left menu. This opens AgentCommerce, your Zero-Click Shopping and sales engine — the hub for everything your agents sell."
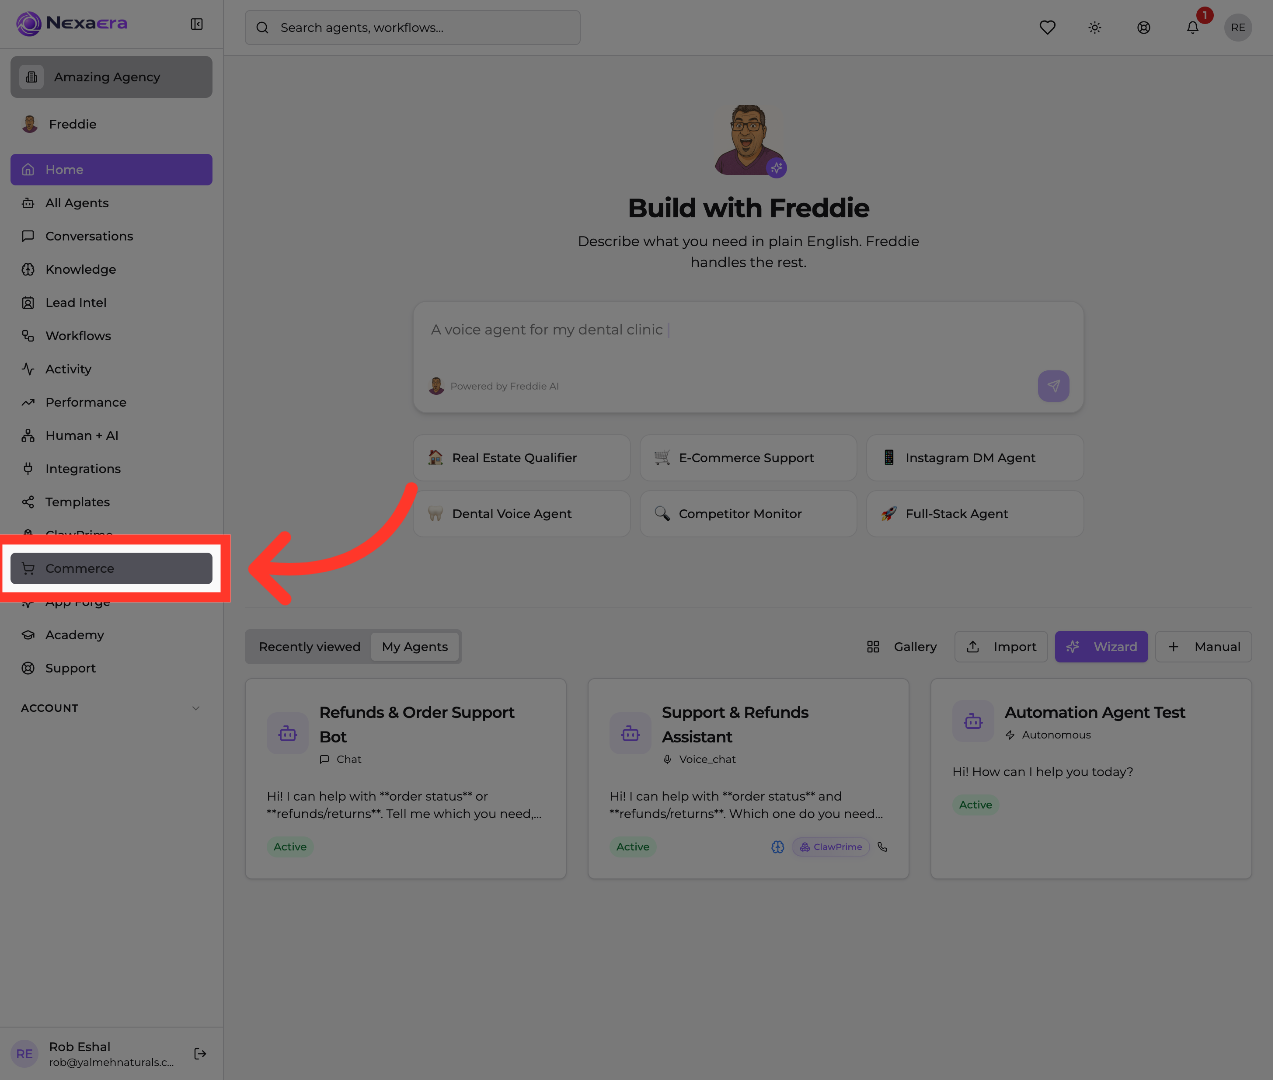
3. Open Connections Page
"Along the top, click 'Connections.' This is where you link your payout and catalog sources. You'll want Stripe connected already; now we're adding Shopify as your product catalog."

4. Initiate Shopify Store Connection
"Scroll down to the 'Catalog sync' area and click 'Connect Shopify Store.' A setup window opens explaining what you'll need. Shopify now uses a Dev Dashboard app, so we'll create one — it only takes a few minutes."
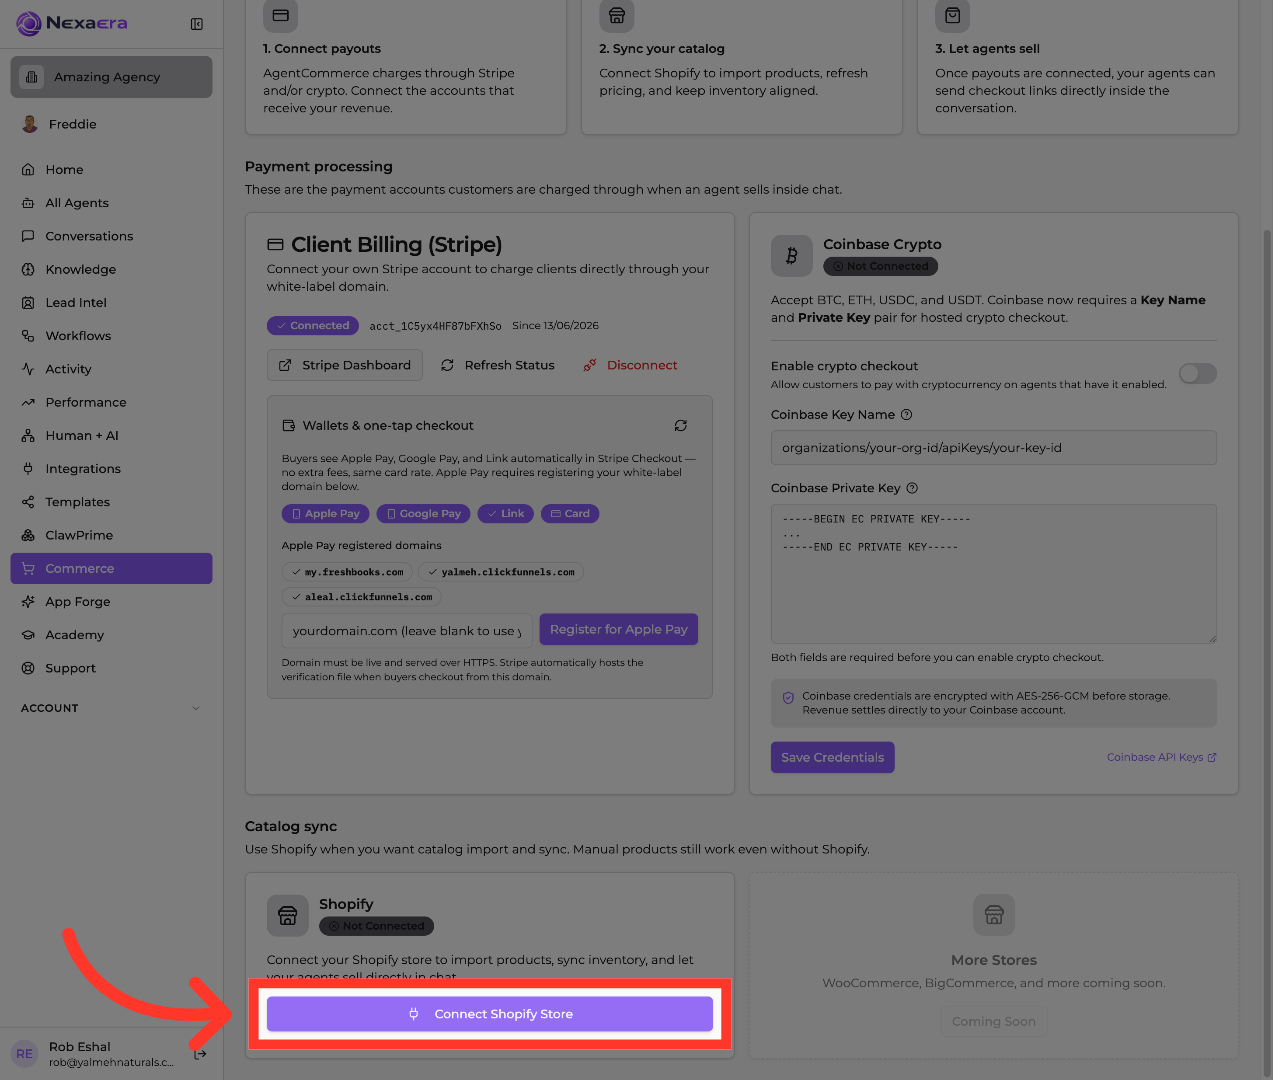
5. Select Shopify Store
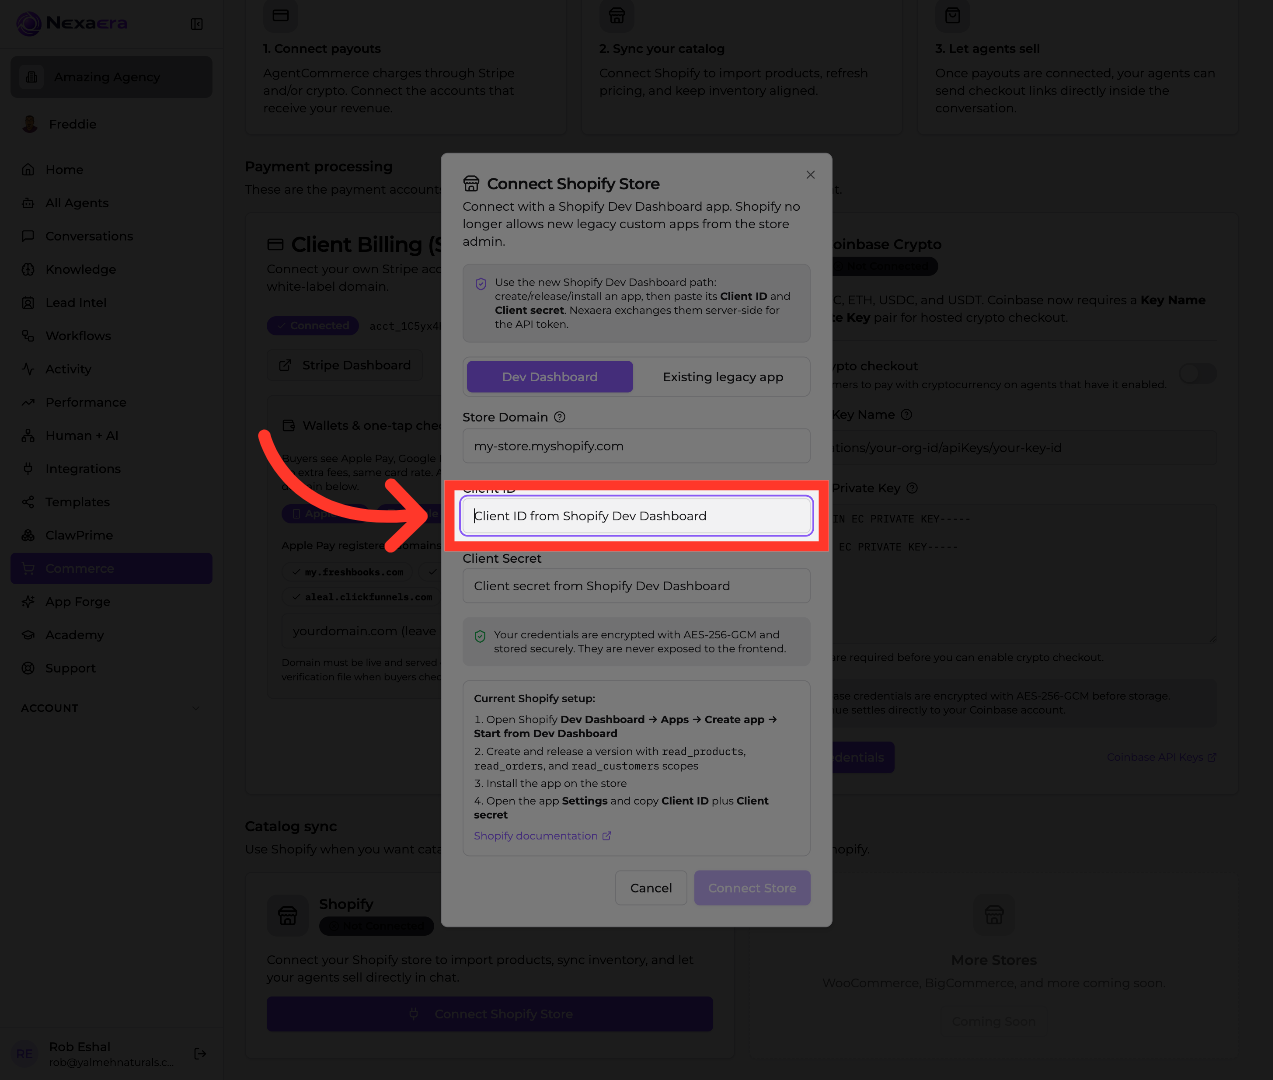
"The 'Connect Shopify Store' window lists everything: your store domain, a Client ID, and a Client Secret from Shopify's Dev Dashboard. Keep this window open — we'll come back to it. First, let's go get those details from Shopify."

6. Navigate to Shopify Admin
"Open a new tab and head to admin.shopify.com. This is your Shopify store's admin dashboard, where we'll create the custom app that connects to NexaEra."
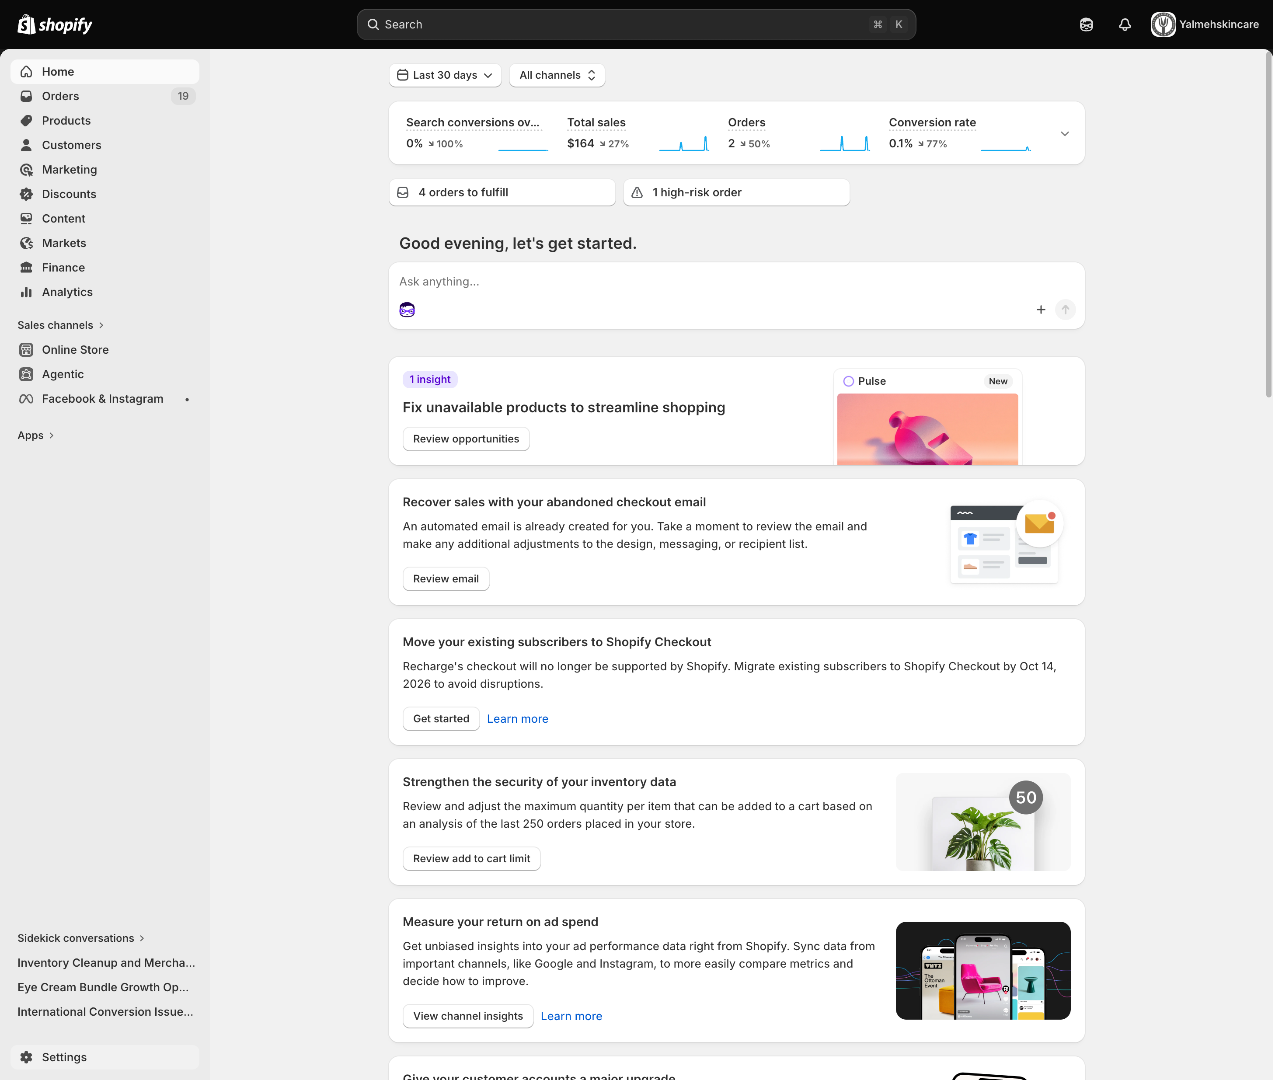
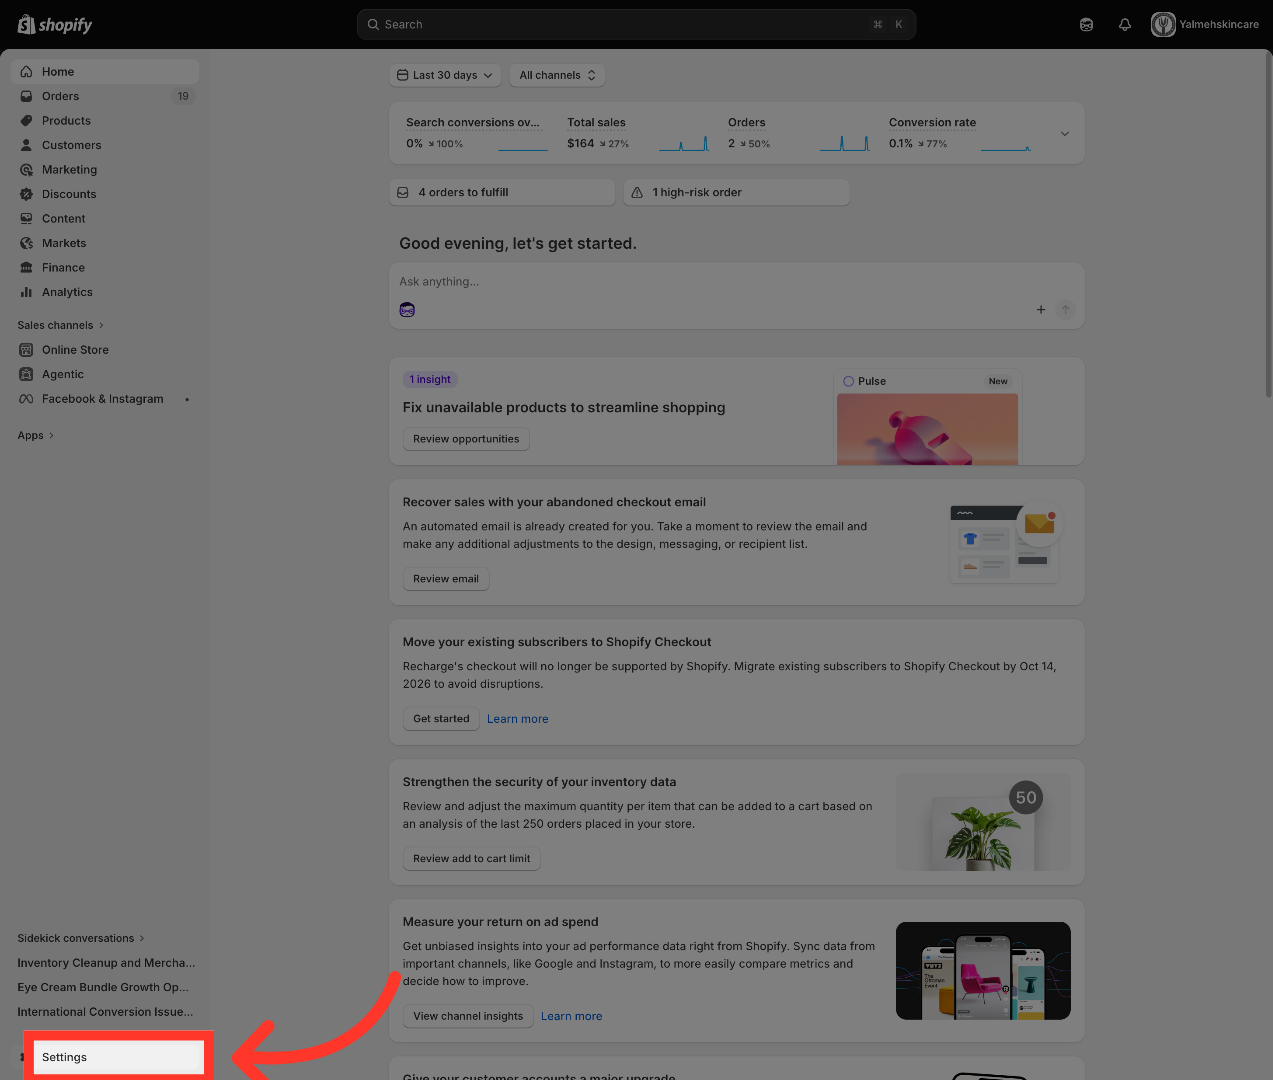
7. Open Shopify Settings
"In the bottom-left corner of your Shopify admin, click 'Settings.' This opens your store's configuration options."
8. Access Apps Section
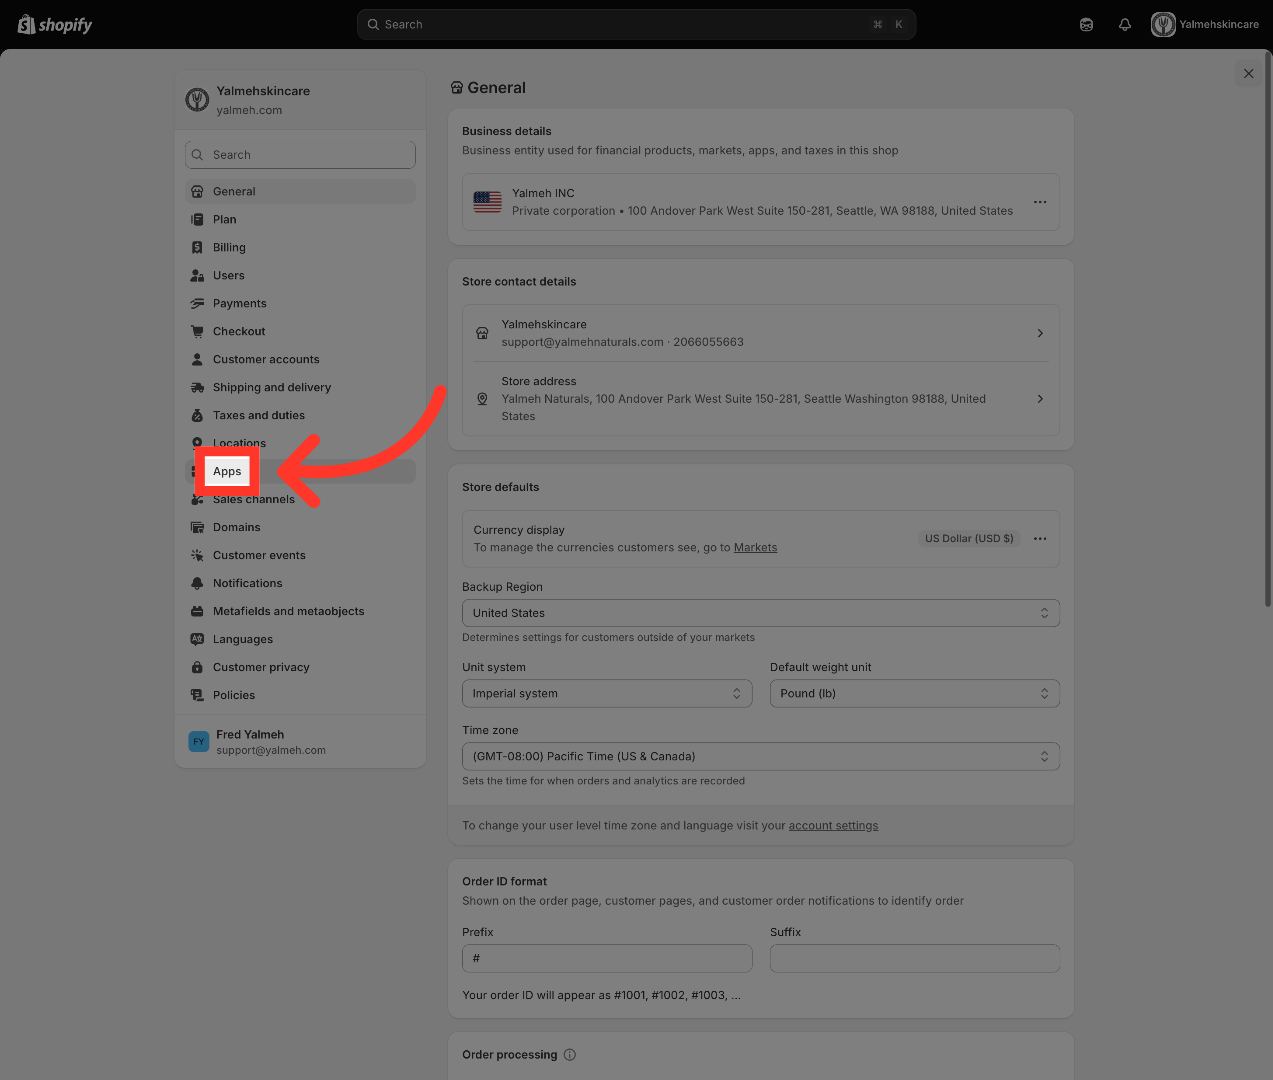
"In the Settings menu, click 'Apps and sales channels.' This is where you manage every app installed on your store."
9. Open Developer Apps
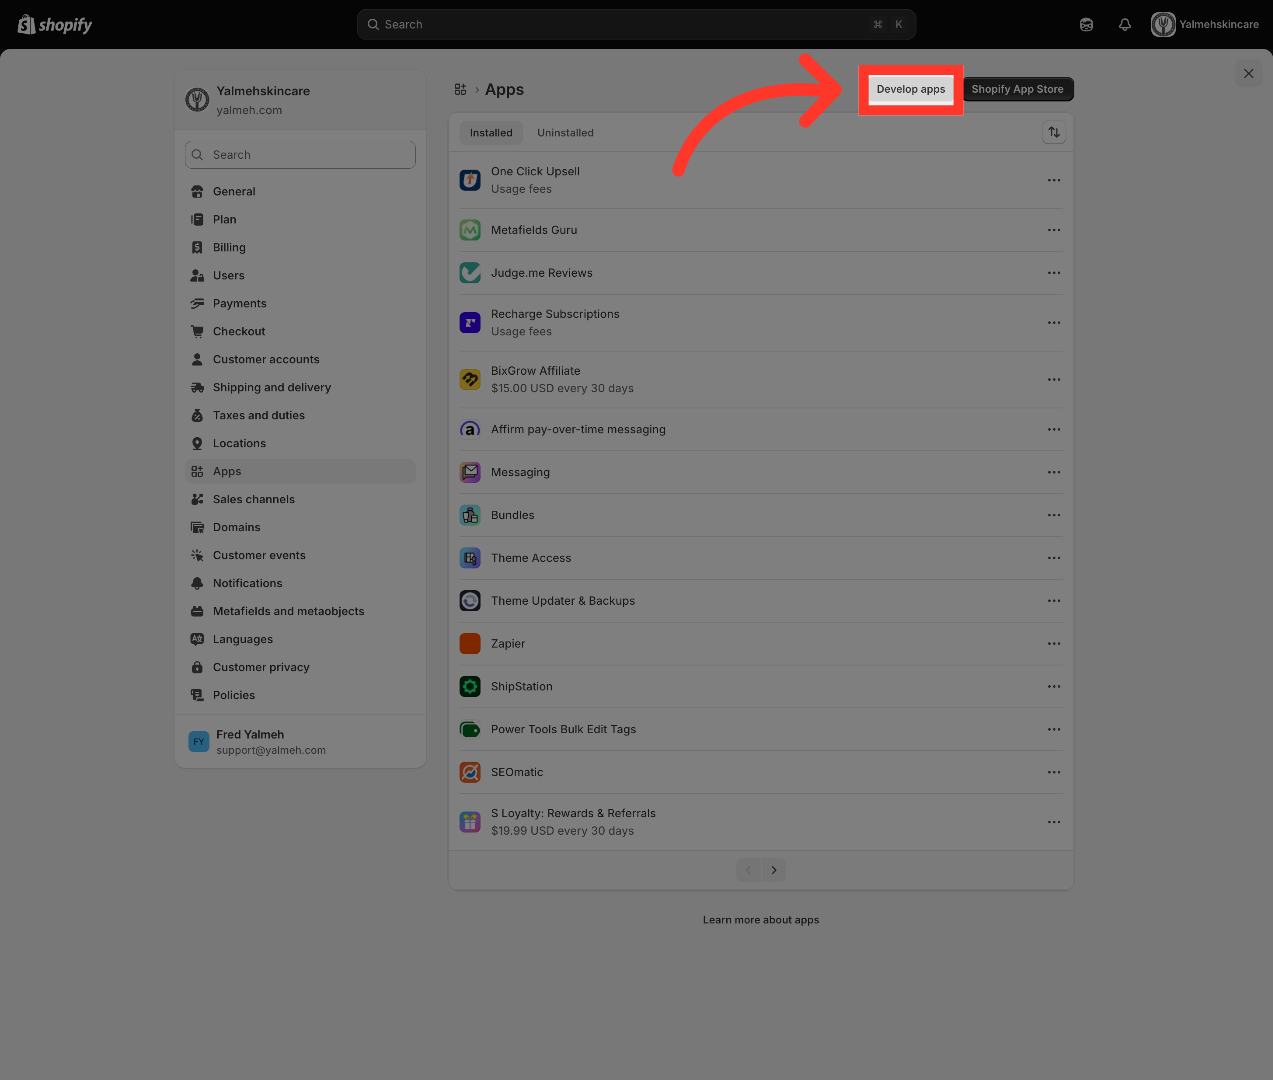
"At the top of the Apps page, click 'Develop apps.' This is where you build custom apps — the kind that can talk to NexaEra."
10. Open Dev Dashboard
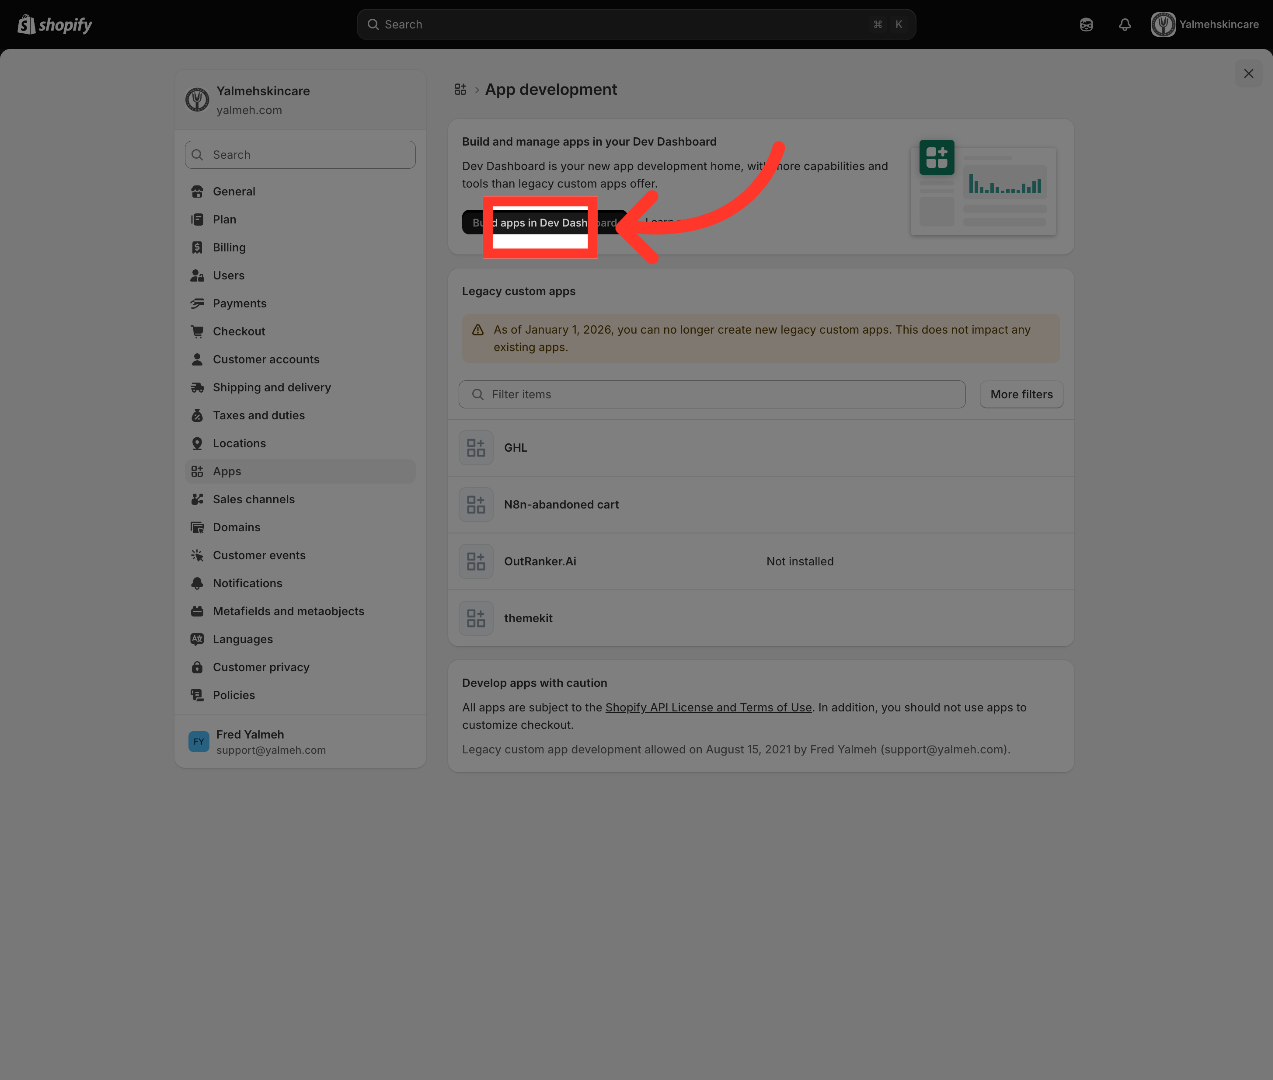
"Click 'Build apps in Dev Dashboard.' Shopify moved custom app creation into its new Dev Dashboard, so this takes you there. Note that legacy custom apps can't be created anymore, so this is the current path."
11. Switch to Dev Dashboard
"You're now on dev.shopify.com — Shopify's developer environment. This is where you'll create and manage your app and get its credentials."
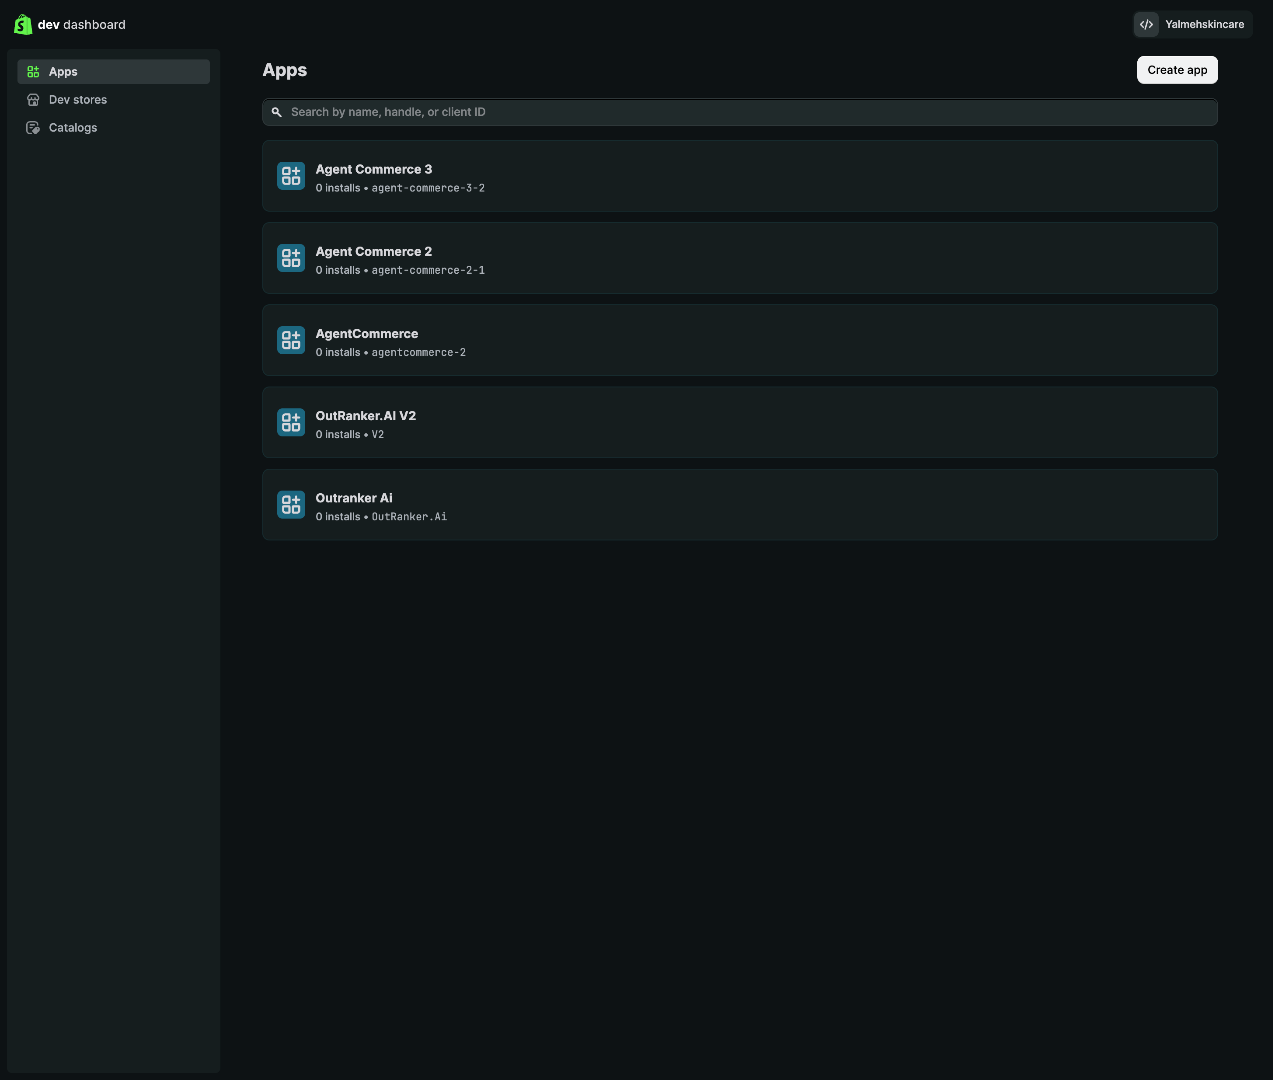
12. Create New App
"In the top-right corner, click 'Create app.' This starts building the custom app that links your store to NexaEra."
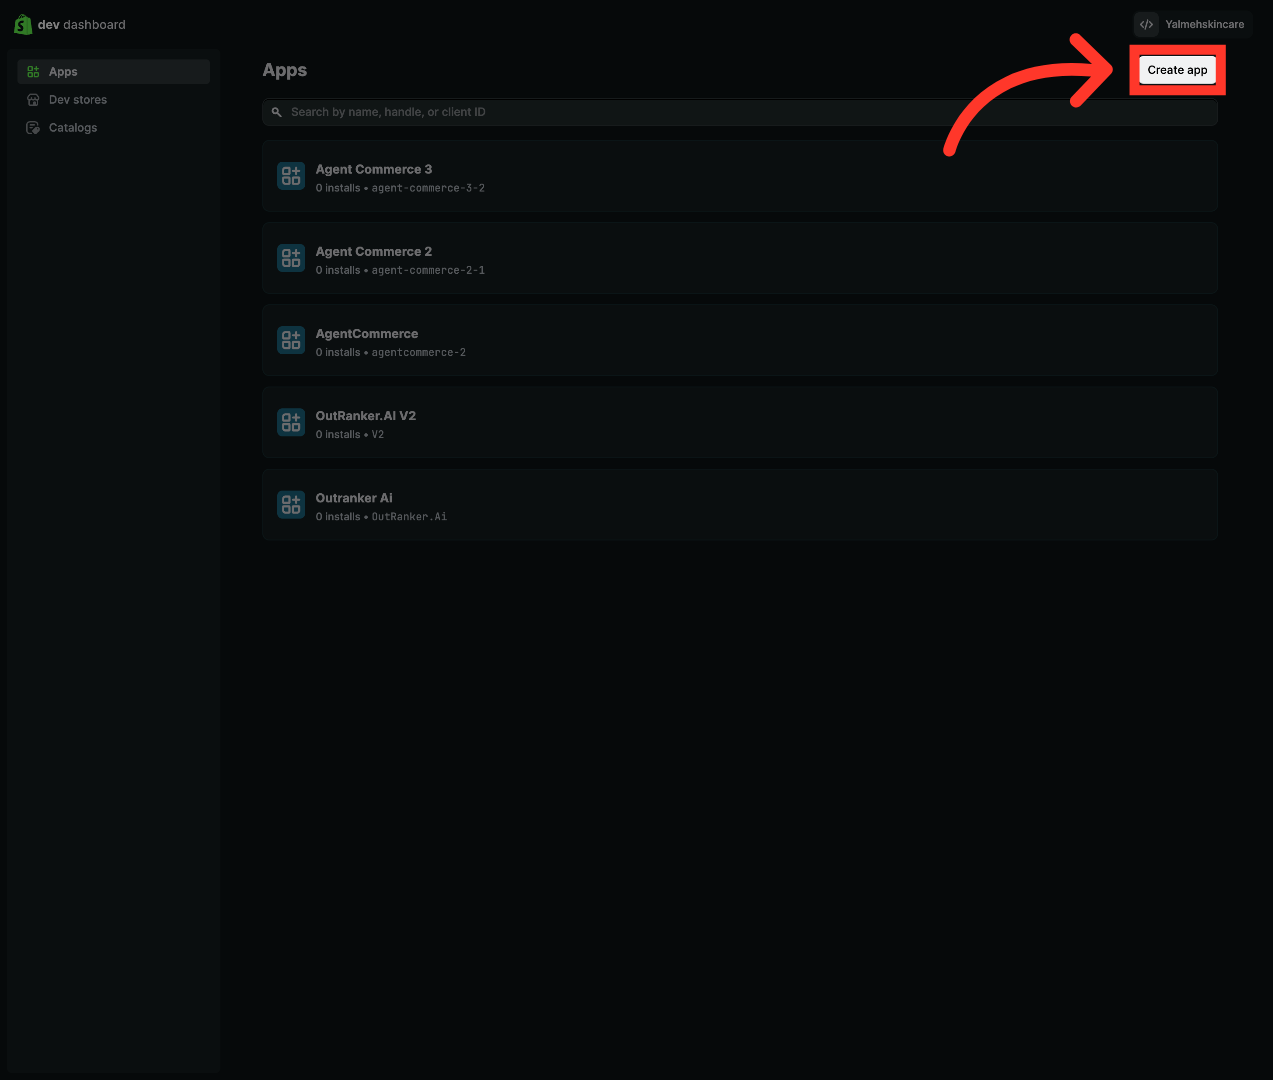
13. Name Your App
"Under 'Start from Dev Dashboard,' type a name for your app — something clear like 'AgentCommerce' so you'll recognize it later."
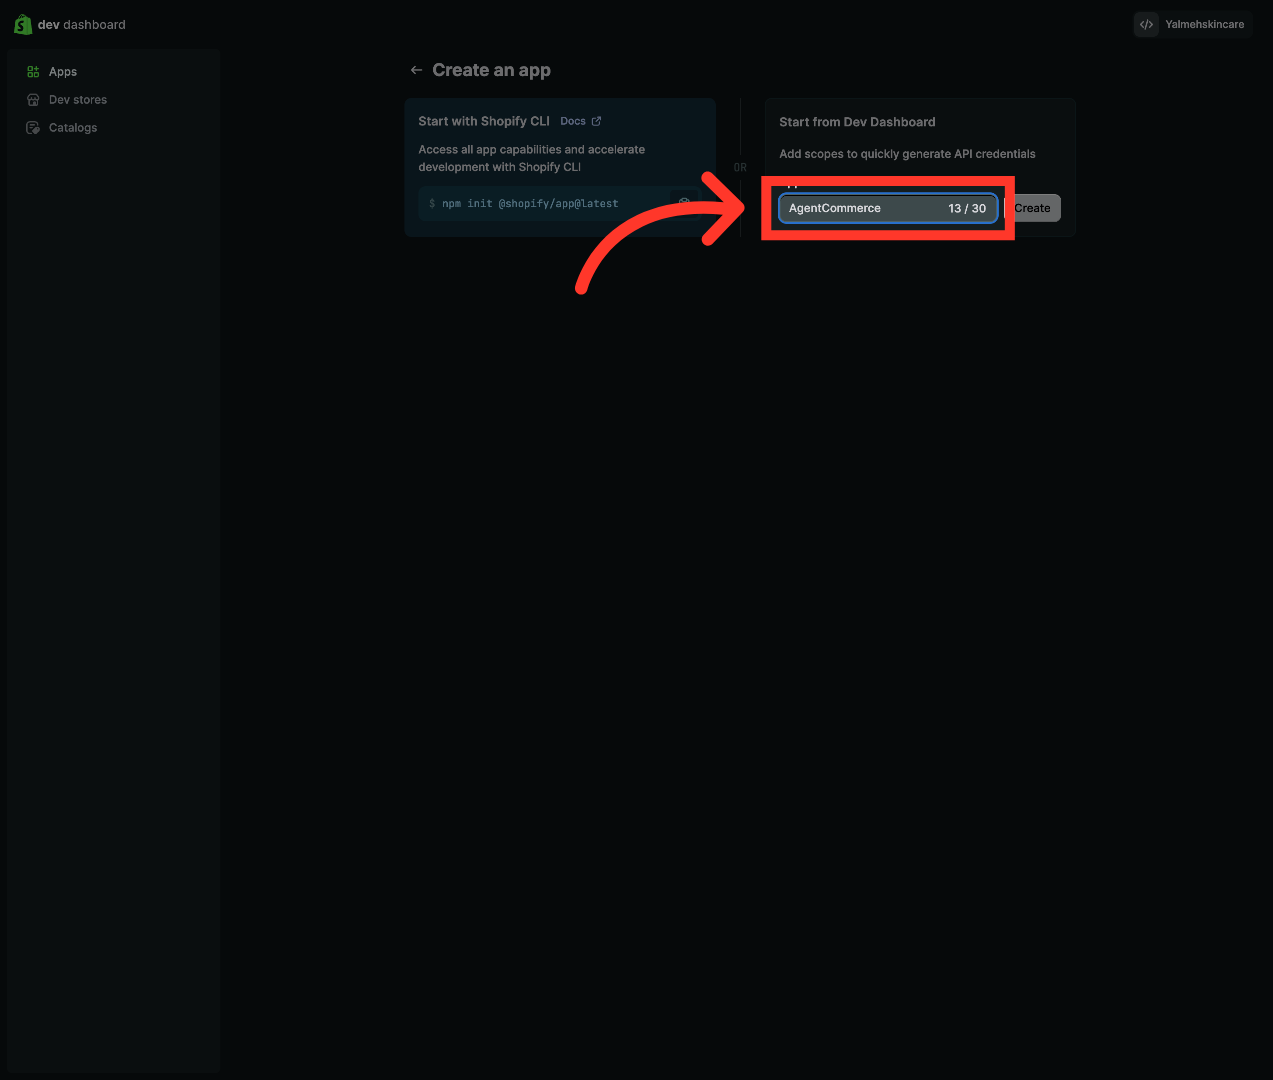
14. Confirm App Creation
"Click 'Create' to finalize it. Shopify sets up your new app and takes you to its configuration page."

15. Fill Correct Scopes
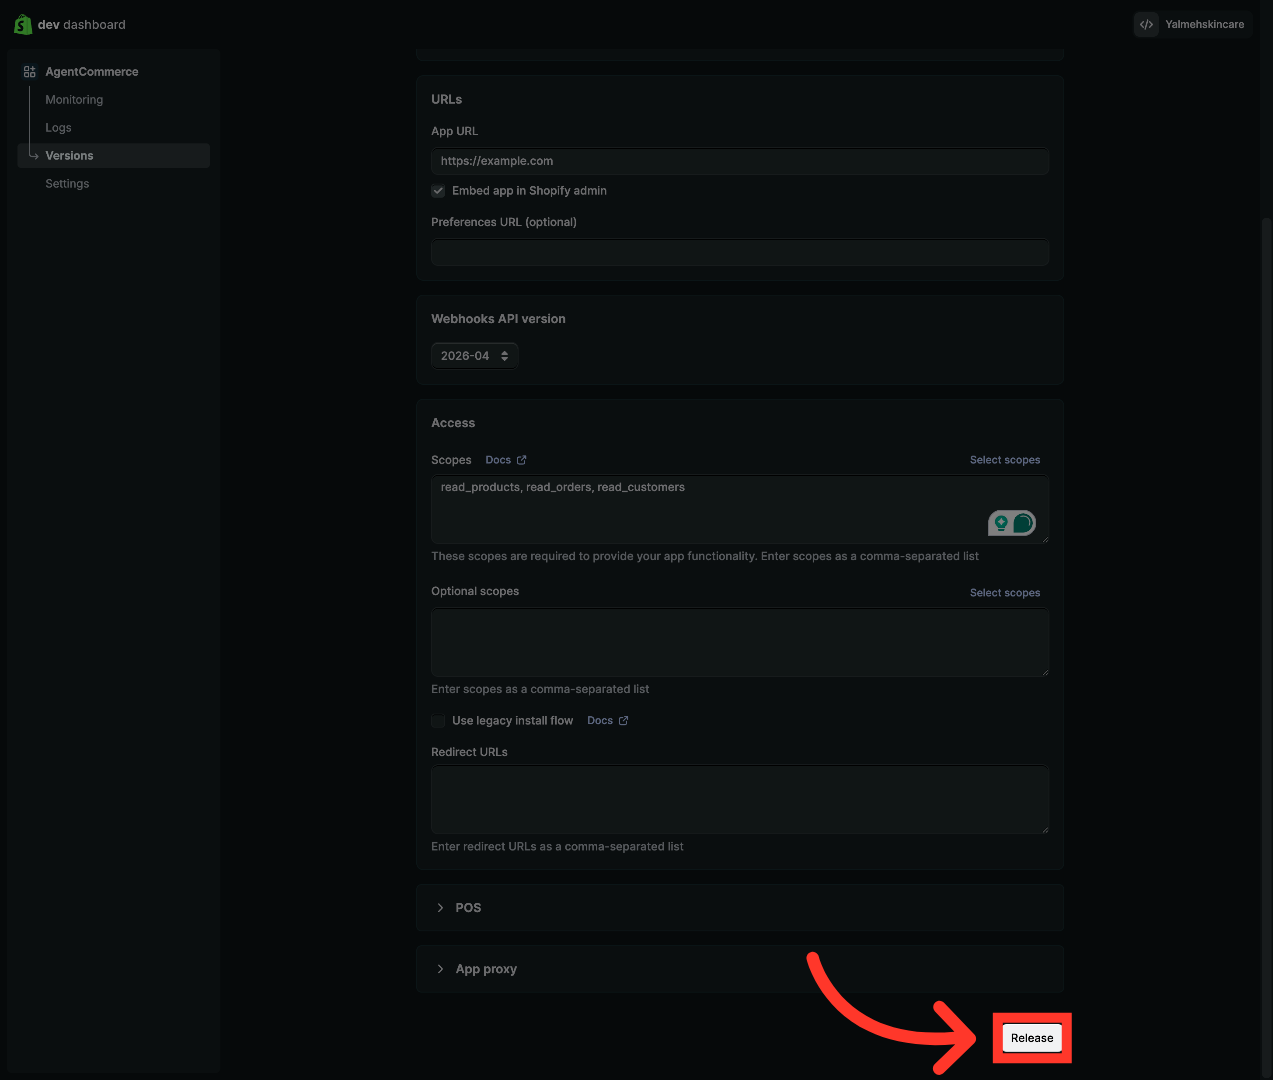
"Now find the Access section and click into the scopes box. Type in exactly these three, separated by commas: read_products, read_orders, read_customers. These let NexaEra read your catalog, orders, and customers — read-only, so nothing on your store gets changed."
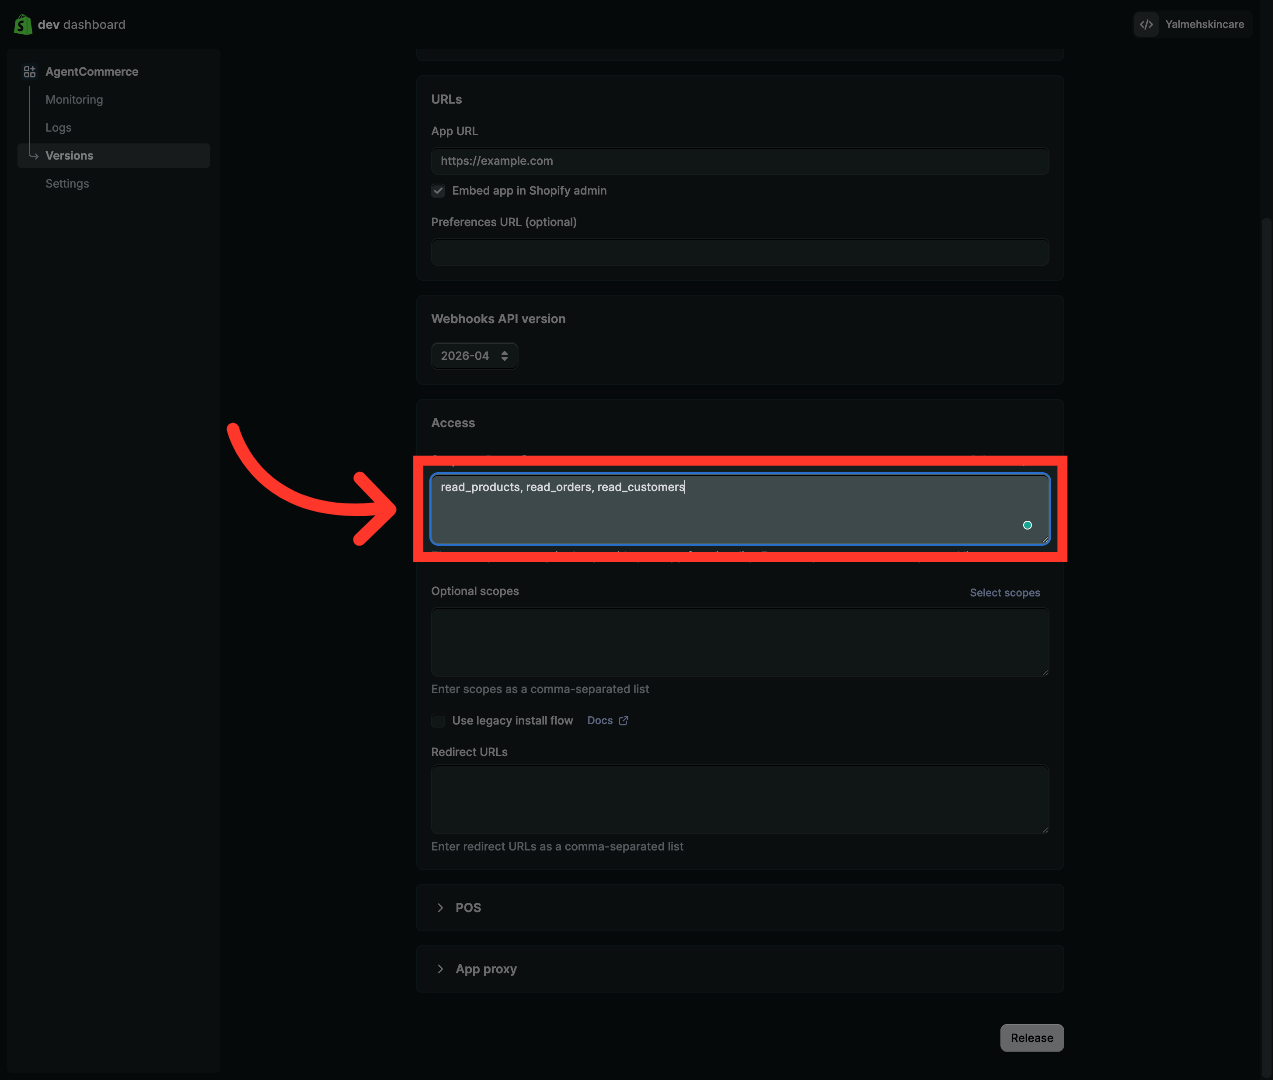
16. Release App Version
"Click 'Release' in the bottom-right to publish this version of your app. Your scopes only take effect once the version is released."
17. Confirm Release
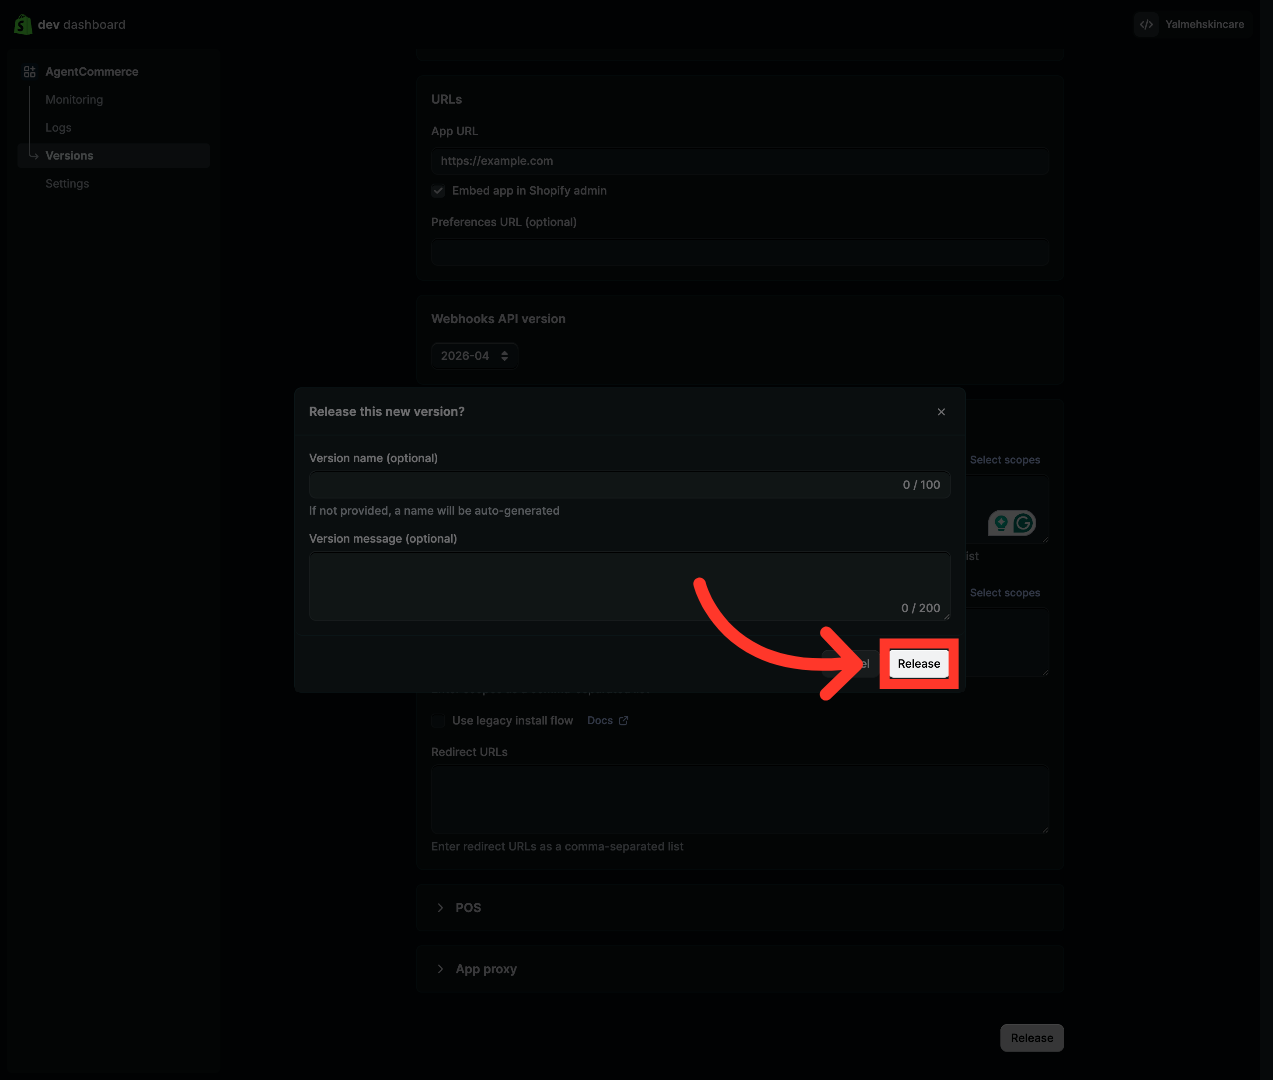
"A confirmation box appears. You can add a version name and message, but they're optional. Click 'Release' again to lock it in."
18. Open App Settings
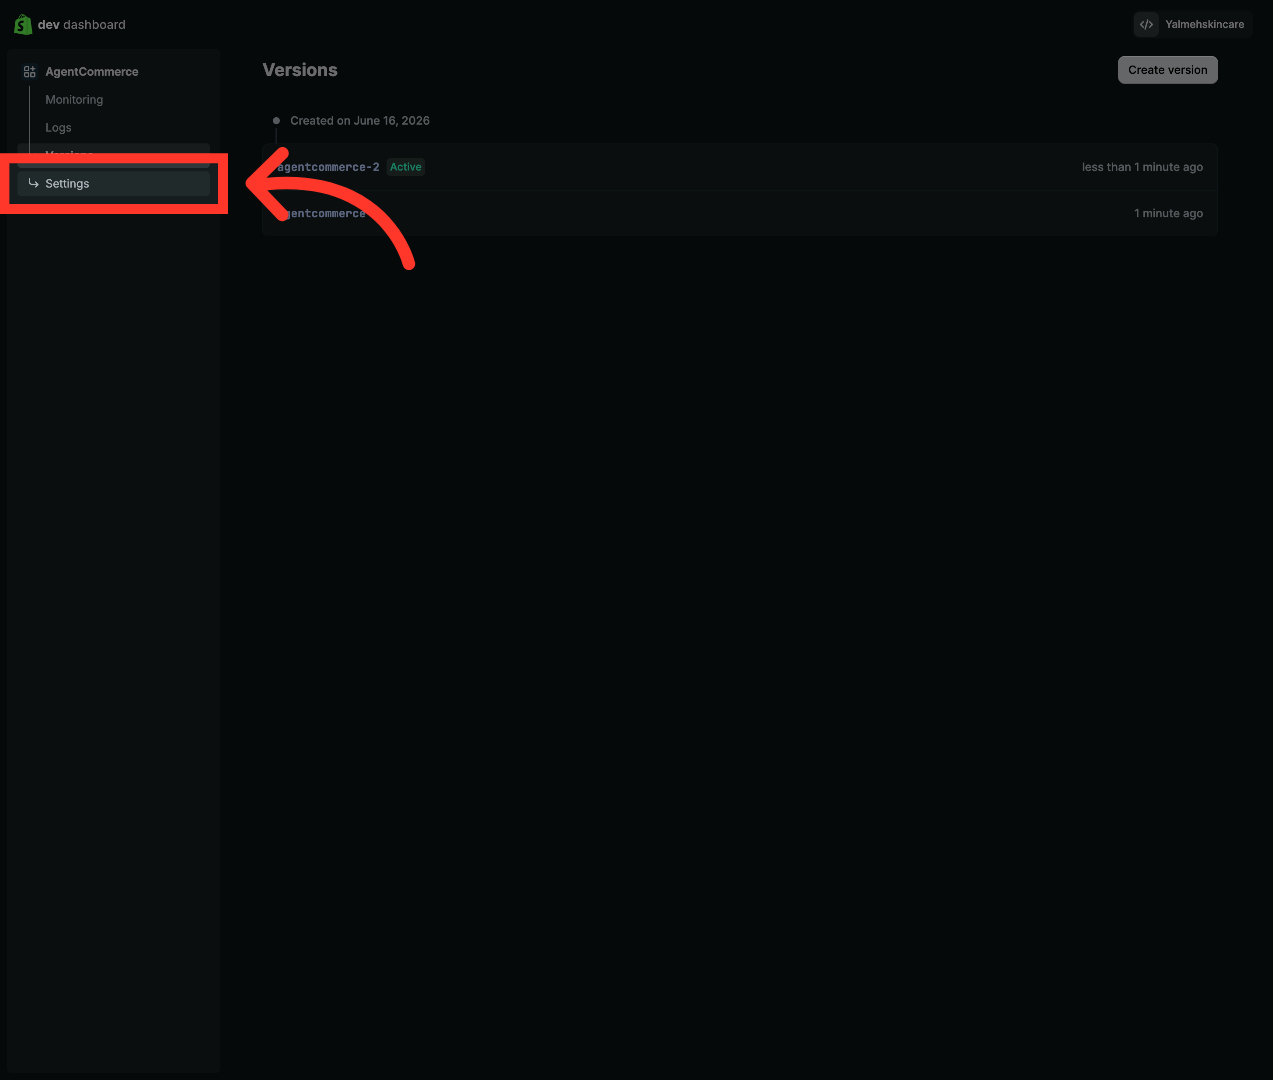
"In the left menu, click 'Settings.' This is where your app's credentials live — the Client ID and Client Secret we need for NexaEra."
19. Access Settings Details
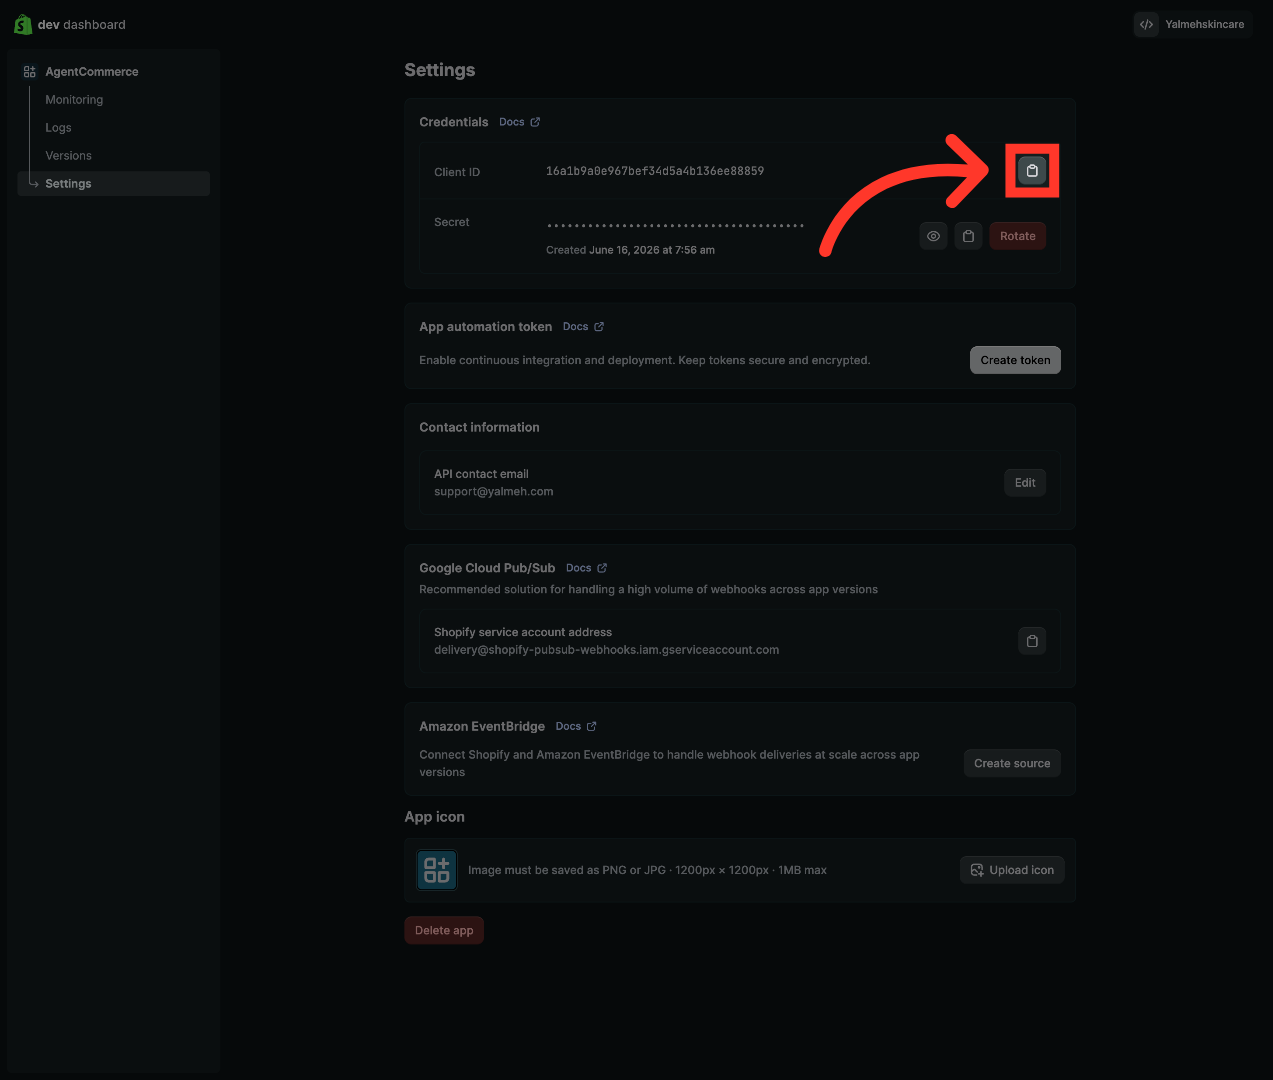
"At the top of Settings, you'll see the Credentials section with your Client ID and Client Secret. This is the key info that connects the two platforms."
20. Select Client ID Field
"Copy your Client ID — it's the string shown right there in the Credentials box. In a moment you'll paste it into NexaEra's Client ID field."
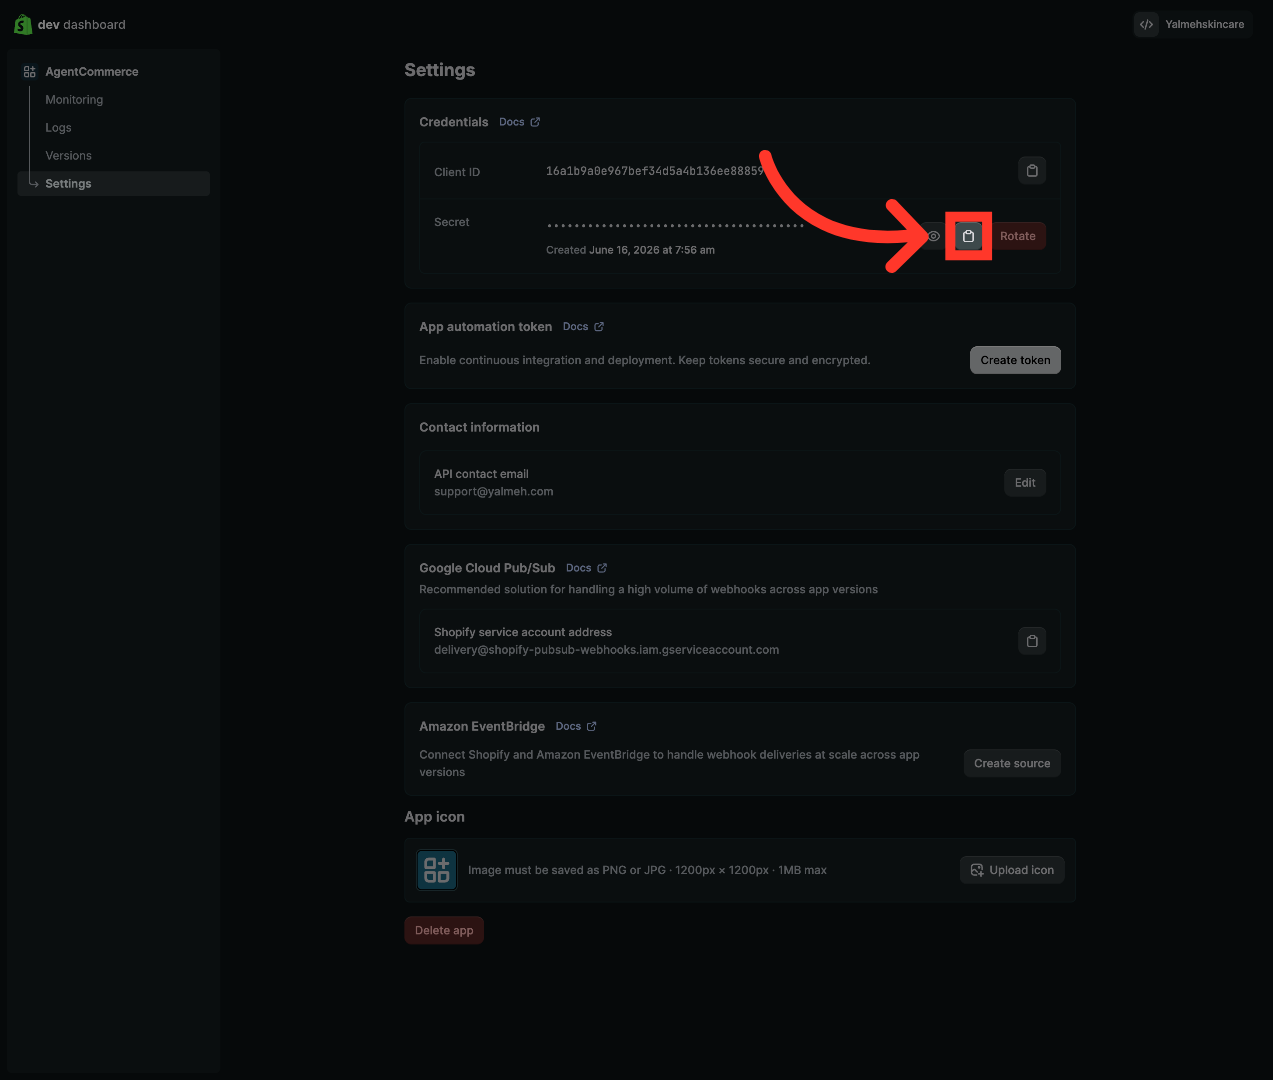
21. Access Secret Settings
"Next to the Secret field, click the reveal icon to show your Client Secret. Keep this one private — treat it like a password, and never share it publicly. Copy it."
22. Select Client Secret Field
"That Client Secret pairs with the 'Client secret from Shopify Dev Dashboard' field back in NexaEra. Hold onto it — we'll paste it in shortly, along with your store domain."

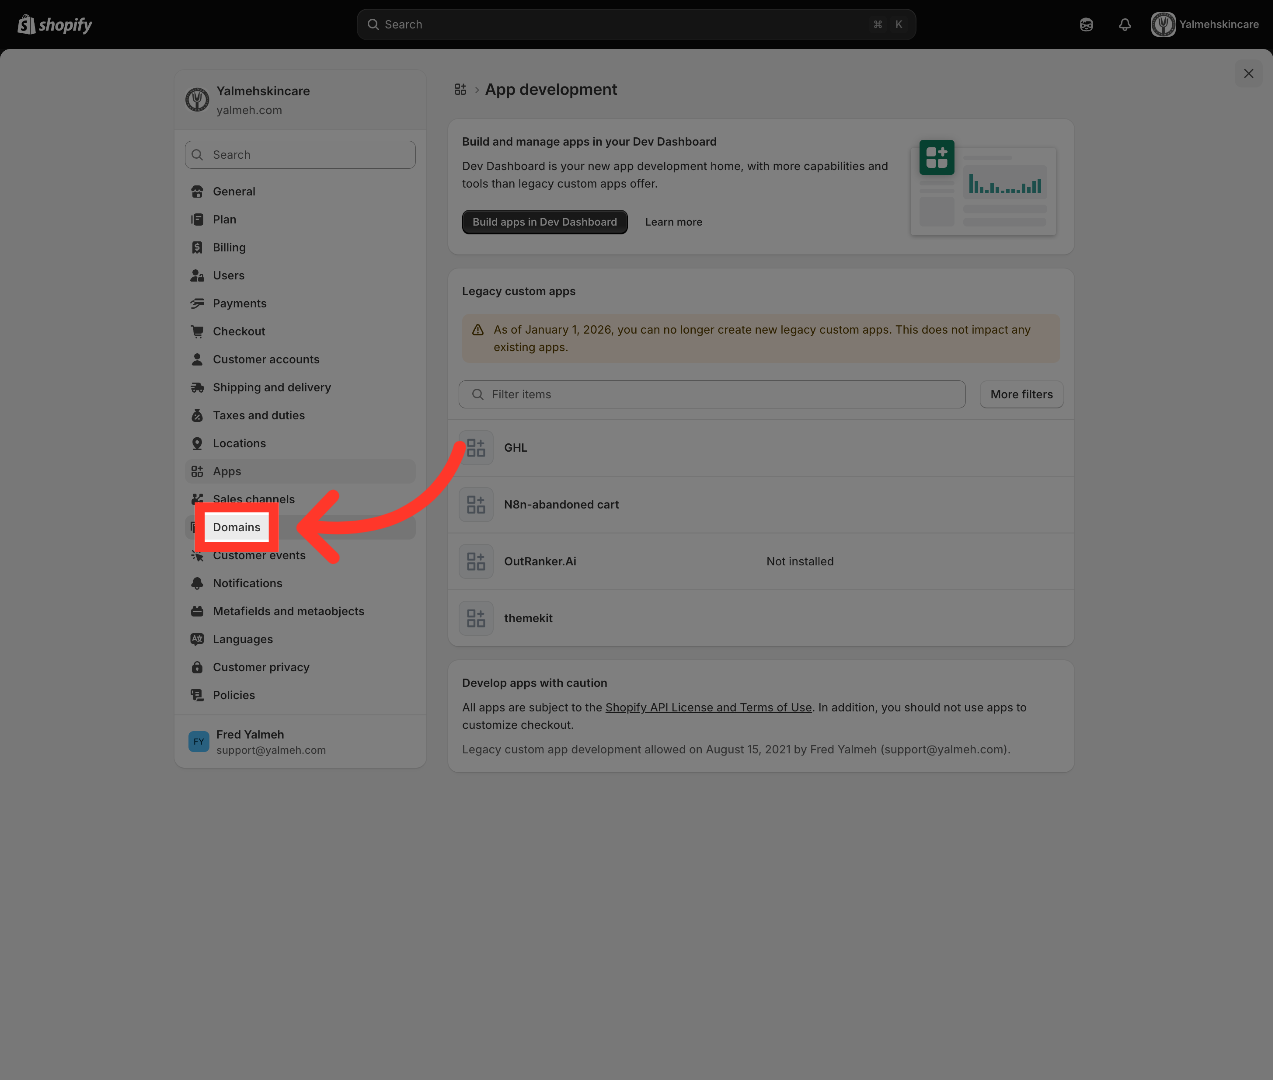
23. Open Domains Section
"Back in Shopify, click 'Domains' in the Settings menu. This shows your store's domains, and you'll need your myshopify address for the connection."
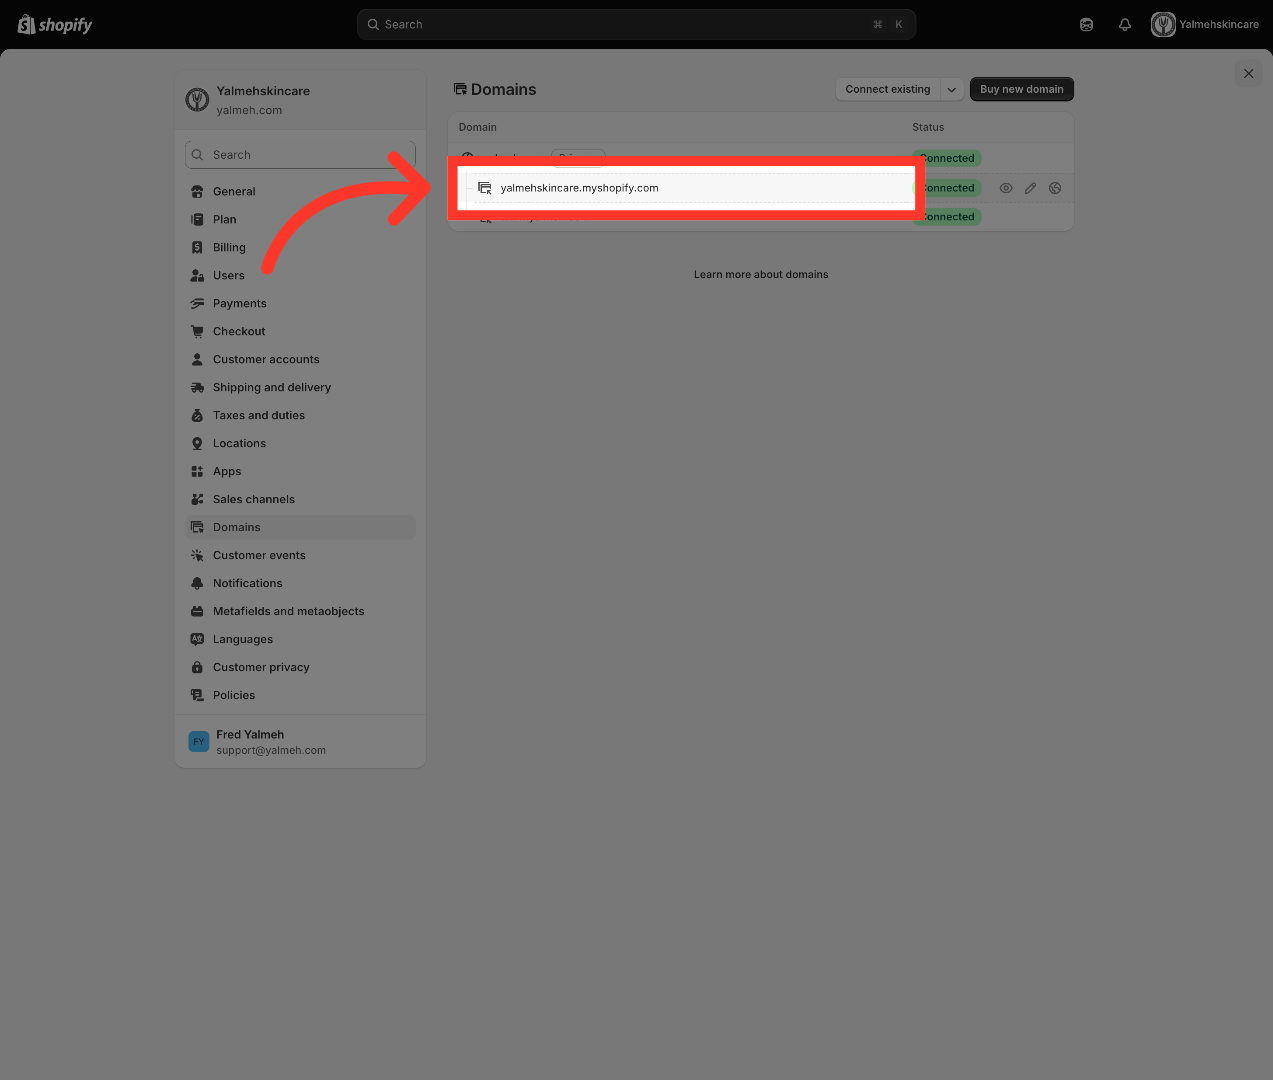
24. Select Store Domain
"Copy your store's myshopify.com domain — for example, yourstore.myshopify.com. This is the exact address NexaEra uses to find your store, so grab the full thing."
25. Select Shopify Store
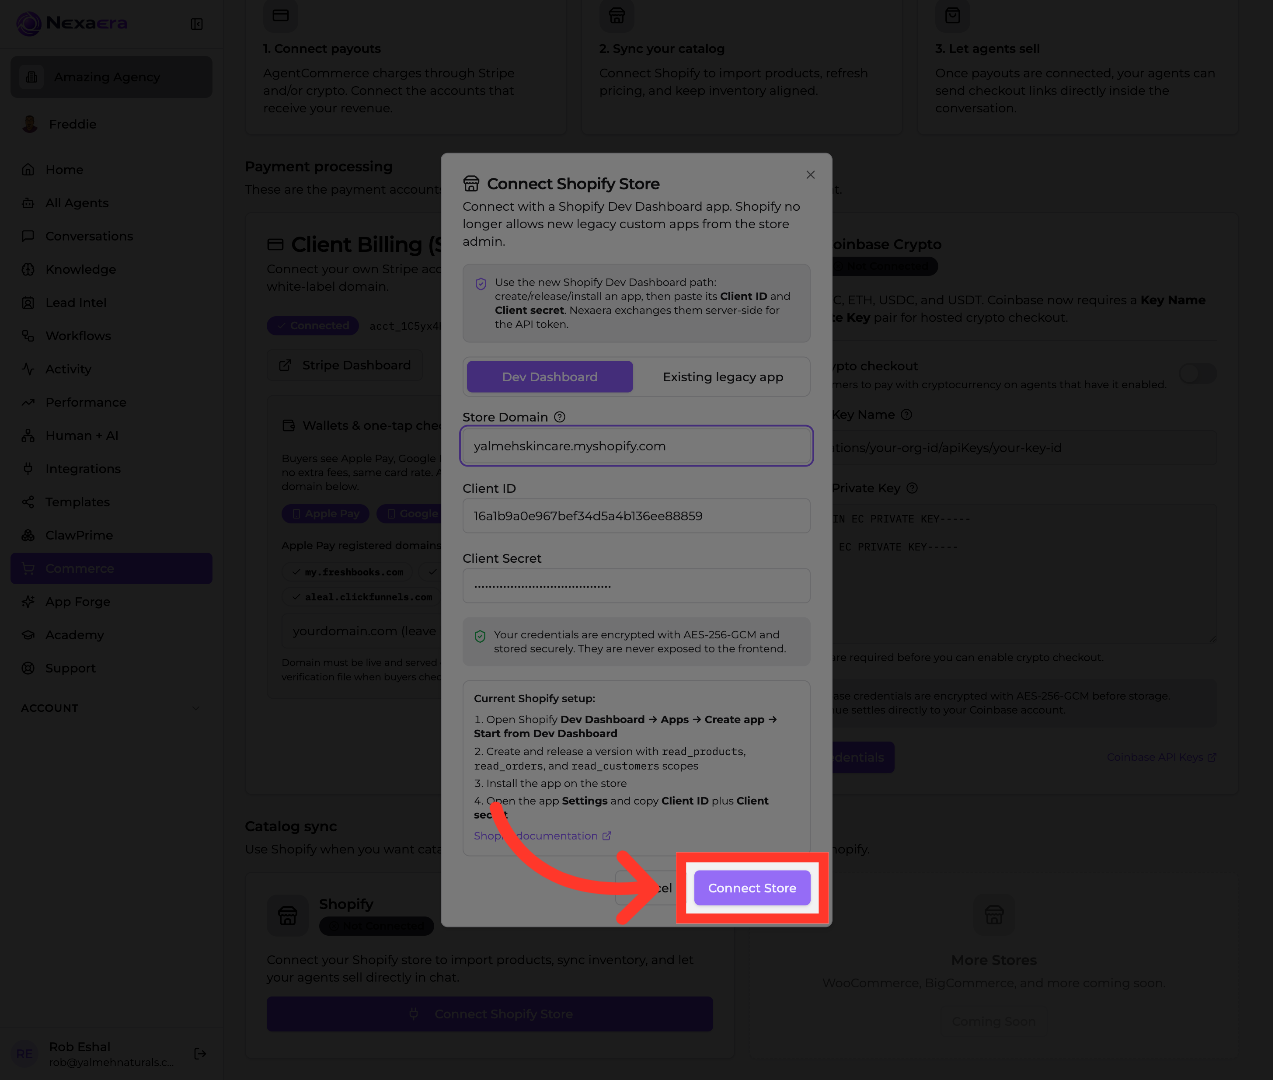
"Now switch back to the NexaEra 'Connect Shopify Store' window. In the 'Store Domain' field, paste your myshopify address — like yourstore.myshopify.com."

26. Connect Shopify Store
"Paste your Client ID into the Client ID field and your Client Secret into the Client Secret field. Double-check they're in the right spots, then click 'Connect Store' to link everything. Your credentials are encrypted and never exposed on the frontend."
27. Install Shopify App
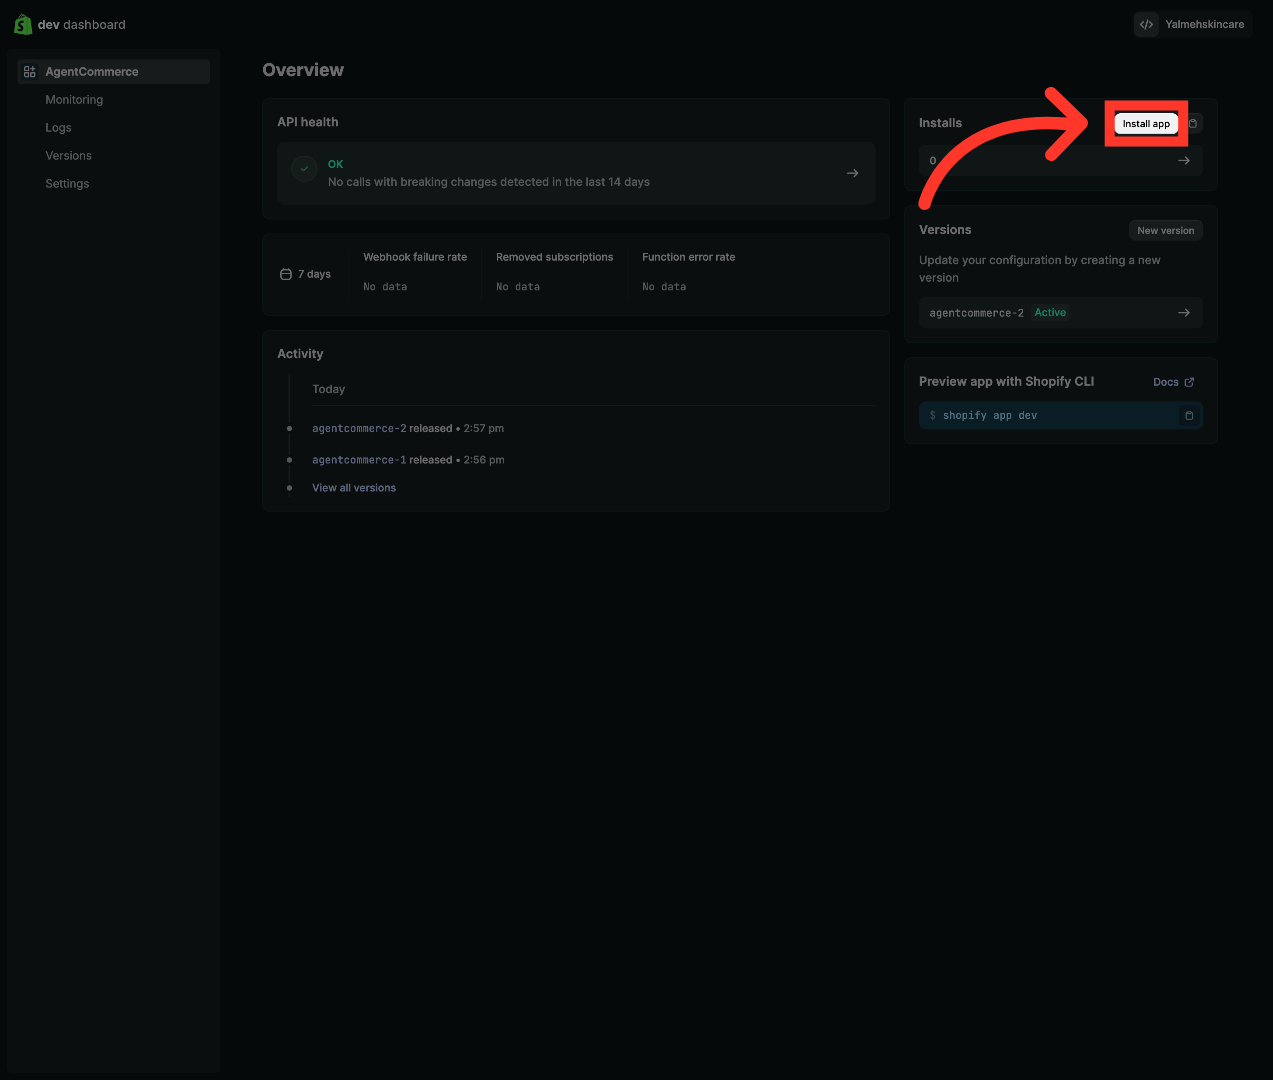
"Head back to your Shopify Dev Dashboard and click 'Install app' in the top right. This adds your new custom app to your live store so the connection can go through."
28. Confirm App Installation
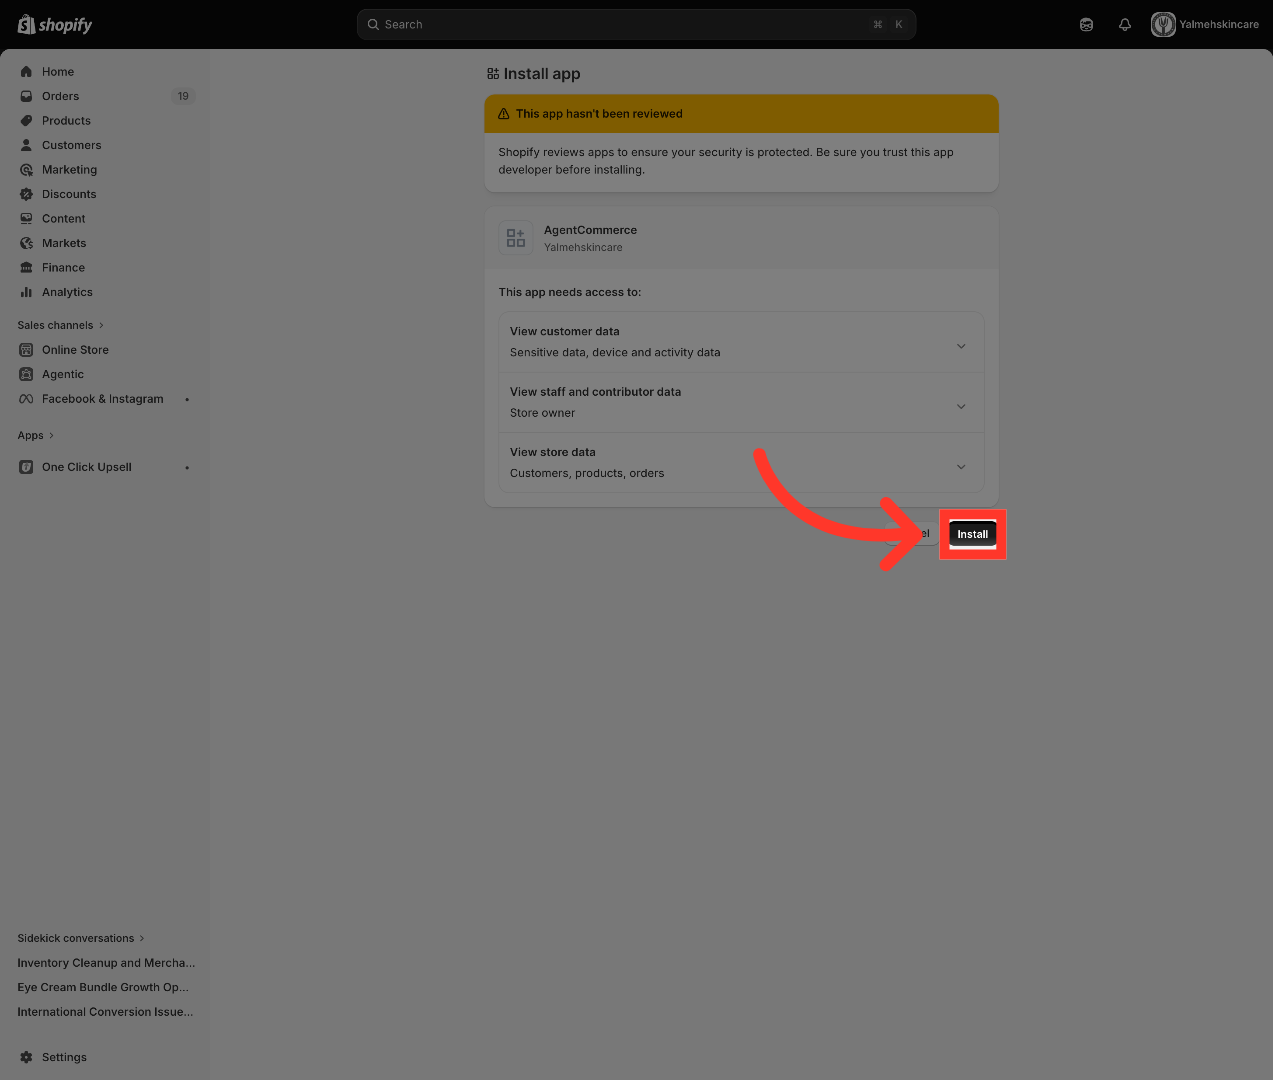
"Shopify shows you exactly what the app can access — your customer, staff, and store data, all read-only. Review it, then click 'Install' to finalize. Since it's your own custom app, the 'not reviewed' notice is expected."
29. Access Products Section
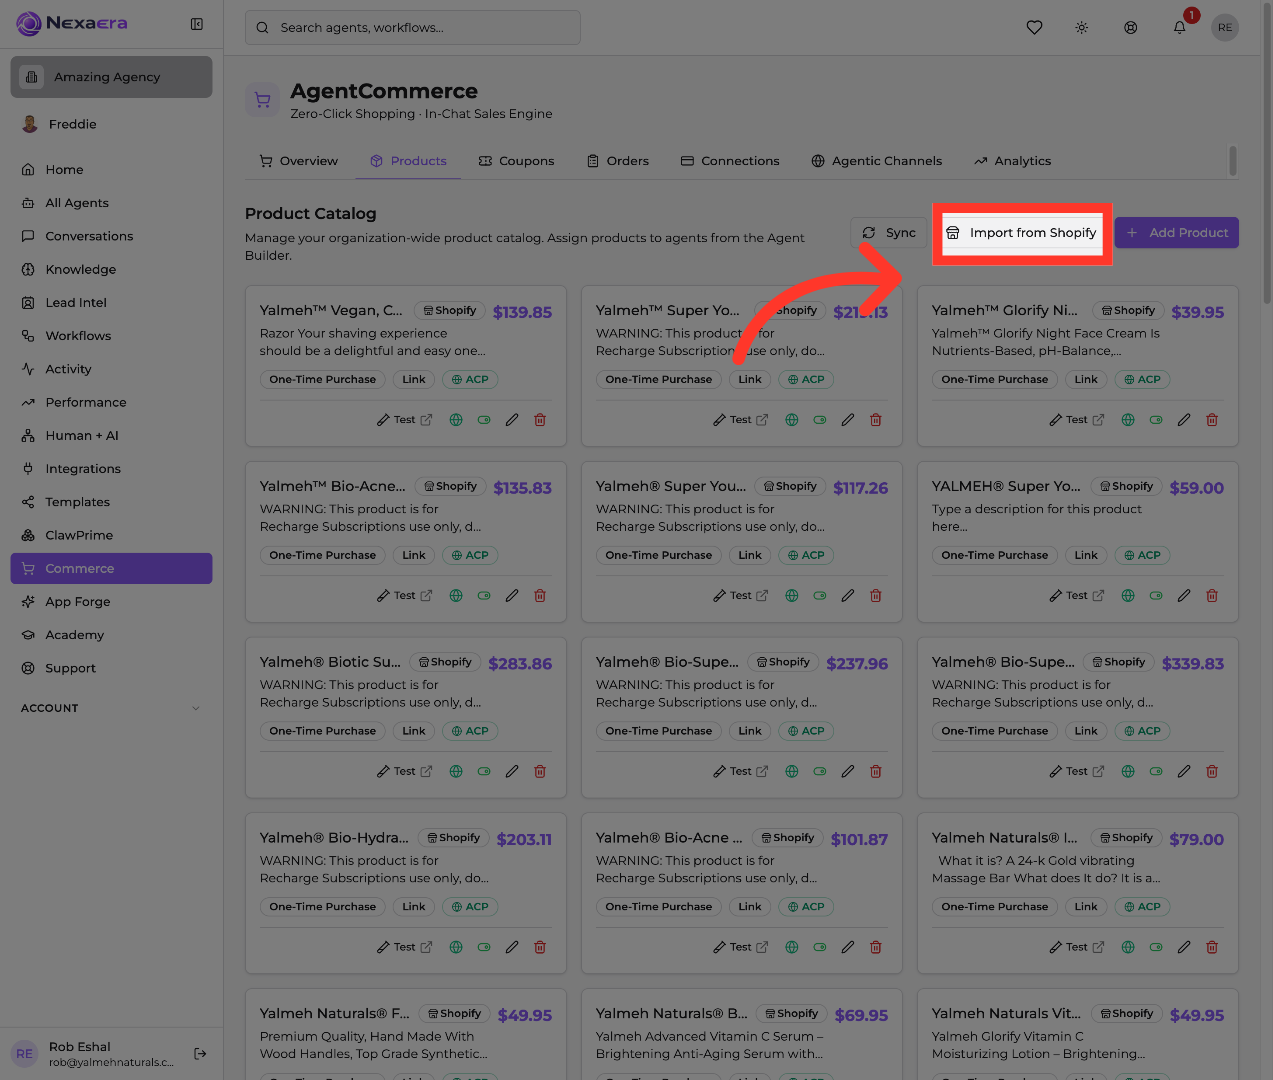
"Back in NexaEra Commerce, click 'Products.' This opens your product catalog, now synced from Shopify — names, prices, and details all pulled in automatically."

30. Select Product
"Take a look at your catalog — you should see your Shopify products listed, like your full product line with live prices. That's your confirmation the sync worked. From here, assign products to agents and hit Sync any time to refresh."
"And that's the whole thing — your Shopify store is connected to NexaEra Commerce. It took a few stops through Shopify's Dev Dashboard, but now your entire catalog syncs automatically, and your agents can sell your real products right inside the chat. That was a big one — seriously well done."
Still need help? Ask the team