Configure Voice And Chat Agents In NexaEra Dashboard
"This is where your agent really comes to life. In this walkthrough, we'll open an agent's full configuration and tune everything that matters — its personality, its AI model, its voice, its knowledge, and the guardrails that keep it safe. By the end, you'll have a polished voice-and-chat support agent ready to go live. Let's dive in."
Written By Fred Yalmeh
Last updated About 2 months ago
Go to www.nexaera.com
1. Introduction
"Here's what you'll be able to do by the end: customize your agent's settings, write its system prompt, pick its AI model and voice, connect knowledge and tools, and turn on advanced features that sharpen its responses. It's a big menu, but I'll take it one step at a time."

2. Access All Agents Section
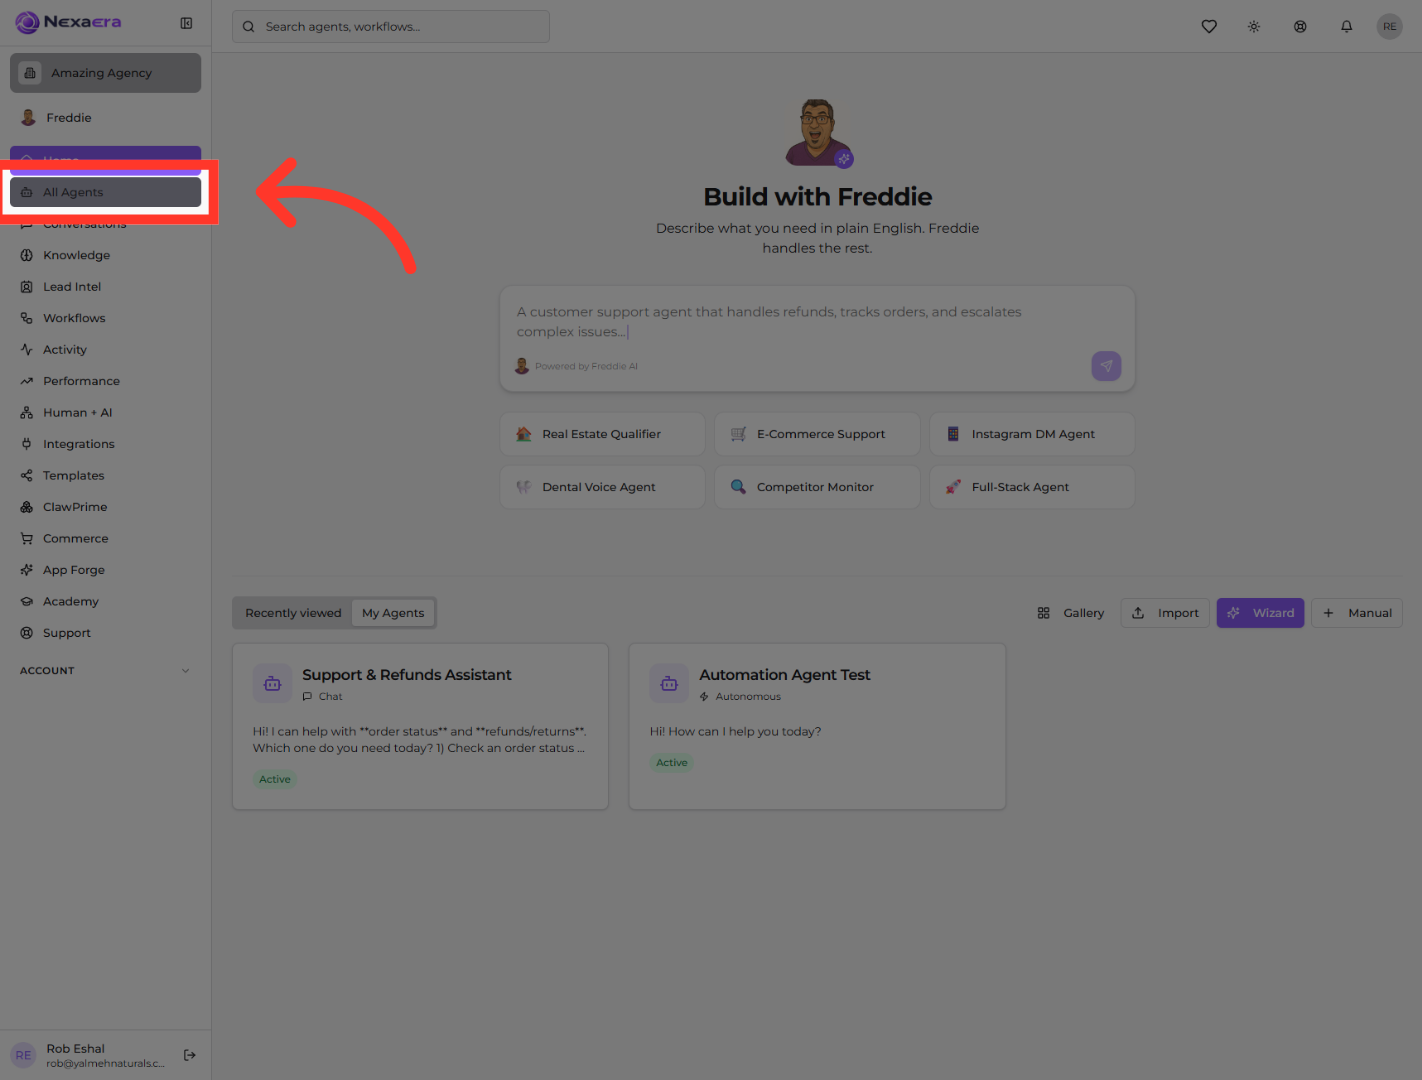
"Start by clicking 'All Agents' in the left menu. This opens the list of every agent in your workspace."
3. Open Chat Tab
"Find the agent you want to work on and click its card to open it. You can pick an existing agent — like a Support & Refunds Assistant — or start building a new one."

4. Open Agent Configuration
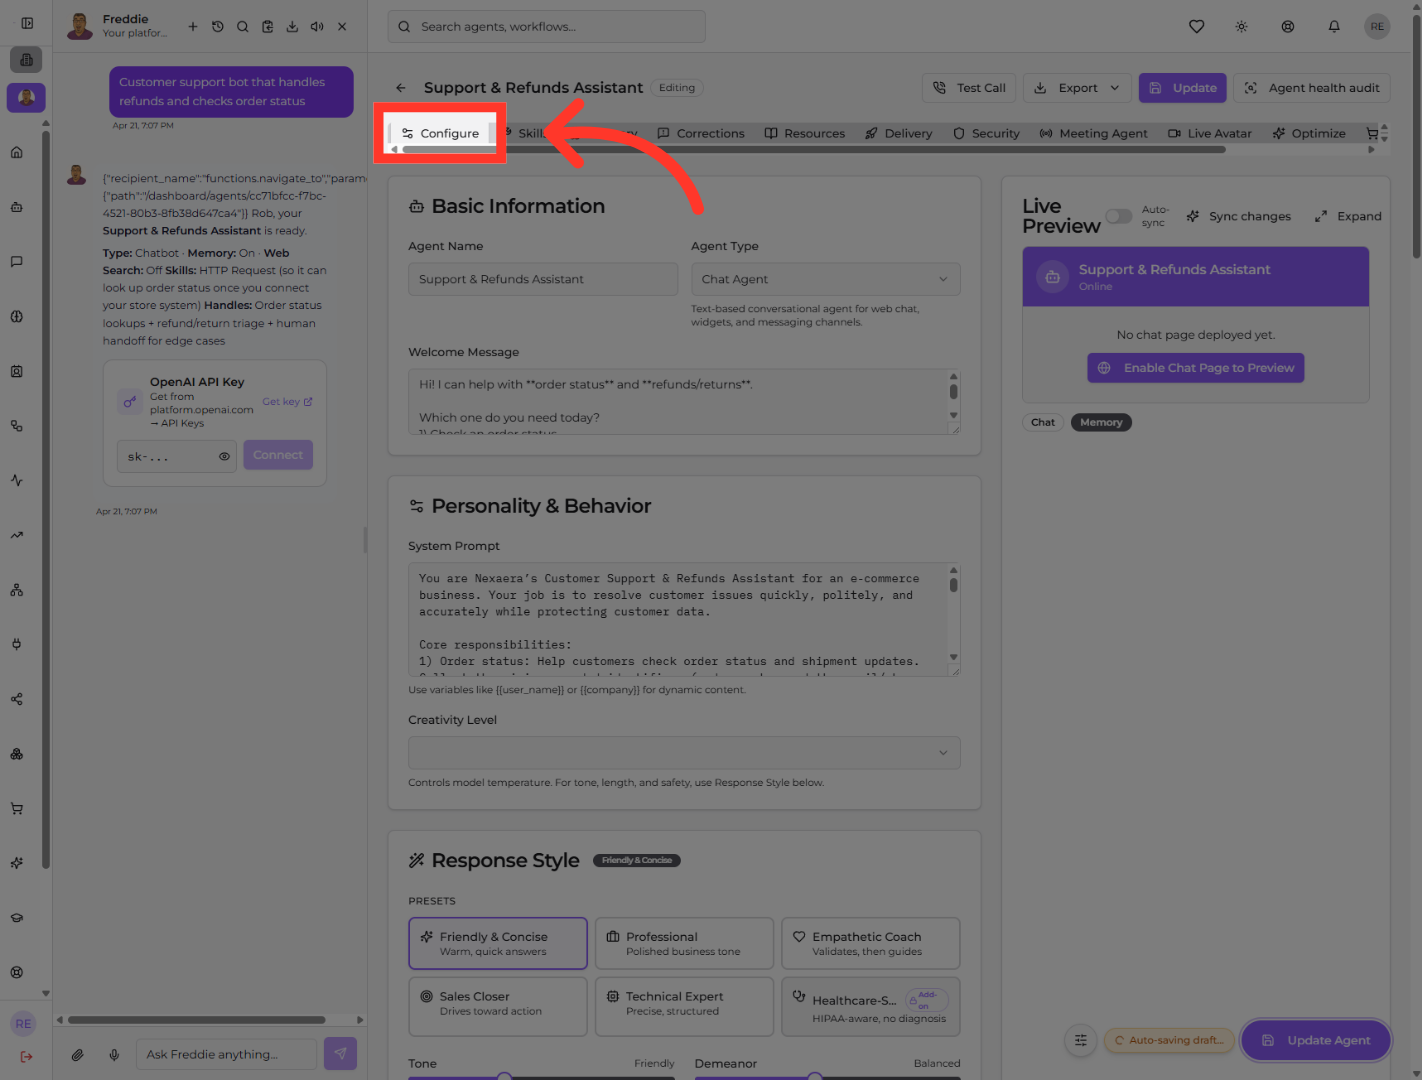
"At the top of the agent, click the 'Configure' tab. This is your main control panel, with everything from basic info to personality, models, and delivery."
5. Select Agent Name
"First, in the Basic Information section, click the 'Agent Name' field. This is the display name your agent goes by across the dashboard, so give it something clear."

6. Choose Voice and Chat Agent
"Next to the name, open the Agent Type dropdown. To let your agent both text and talk, select 'Voice + Chat Agent.' That combines web chat with voice capabilities for a flexible experience."

7. Access Welcome Message Settings
"Now click the 'Welcome Message' box. This is the first thing visitors see when they start a conversation, so make it warm and on-brand — something like a friendly greeting that offers help with orders or returns."

8. Open System Prompt Settings
"Scroll to Personality & Behavior and click the 'System Prompt' field. This is the heart of your agent — the instructions that define its role, tone, and rules. The clearer you are here, the better it behaves."

9. Set Response Length
"Below the prompt, open the Creativity Level dropdown and choose 'Medium.' This controls how varied the responses are — medium keeps replies helpful and consistent without sounding robotic."

10. Select Business Tone
"In the Response Style section, choose a preset that fits your brand. Click 'Professional' for a polished business tone. You've also got Friendly & Concise, Empathetic Coach, and a few others to match your voice."

11. Enable HIPAA Compliance
"Now let's lock in safety. In the Safety & PHI Handling area, open the Safety Level dropdown. For sensitive industries like healthcare, choose 'HIPAA-aware' so the agent handles personal information carefully and never echoes it back."

12. Add Sign-Off Directive
"Click the 'Additional custom rules' field to add your own instructions. For example: 'Always sign off as Dr. Lee's team' or 'Never quote prices in DMs.' These rules get baked right into how the agent responds."

13. Confirm System Prompt Preview
"Want to see exactly how your rules land? Click 'Preview directive injected into system prompt.' This expands to show the full response-style block the agent will follow, so you can confirm everything reads the way you intended."

14. Select AI Model: Claude Opus
"Scroll to Model Configuration and open the Primary Model dropdown. This is the brain of your agent. Pick the model that fits — for the sharpest realtime responses, choose 'Claude Opus 4.8 Fast.' You've also got GPT-5, Gemini, and others to choose from."

15. Review Agent Configuration
"Right next to it, review the Fallback Model. This is the backup that kicks in if your primary model is ever unavailable, so your agent never goes dark. Pick a reliable secondary like a GPT-5 Mini."

16. Enable Feature Option
"Turn on 'Enable Memory' so your agent remembers context from previous conversations. This makes it feel far more personal — it won't ask returning customers the same questions twice."

17. Open Multi-Model Routing
"Scroll to Multi-Model Routing. This lets your agent automatically send each task to the best model for the job — fast, cheap models for simple questions, and heavier reasoning models for complex ones."

18. Enable Research Model
"Flip 'Enable Smart Routing' to on. Now the agent picks the right model per step on its own — saving you money on easy tasks while keeping quality high on the hard ones."

19. Open Language Selection
"Find the Supported Languages section. Click into it to add the languages your agent should understand and reply in. It auto-detects a visitor's language and responds to match — and this works for voice chat too. Leave it empty to default to English only."

20. Edit Social Media URL
"In the Social Media Links section, click a field like X or Instagram and paste your profile URL. These show up on the agent's chat page, so visitors can follow you or learn more about your brand."

21. Access Knowledge Sources
"Now let's give your agent something to know. Scroll to Knowledge Sources — this is where you attach trained data, like help docs or company info, so your agent answers from real, accurate content."

22. Enable Knowledge Source
"Check the box next to a source to switch it on — for example, your Company Knowledge or a product doc. Your agent will now pull answers from that material during conversations."

23. Activate Additional Source
"Want the agent to draw on everything you've trained? Toggle 'All Sources' on. This grants access to every trained source in your organization's database, not just the ones you hand-picked."

24. Enable Further Knowledge Source
"Scroll to Advanced Hallucination Defense and turn on 'Enable Defense.' This scores every retrieved chunk for relevance — and if nothing scores high enough, the agent gives a safe, pre-canned reply instead of making something up. Set your relevance threshold to balance accuracy and coverage."

25. Open MCP Connectors
"In the MCP Connectors section, click '+ Add MCP Server.' This connects external tools and live data sources — like Notion — so your agent can pull real-time context, not just its trained knowledge."

26. Enable File Upload Feature
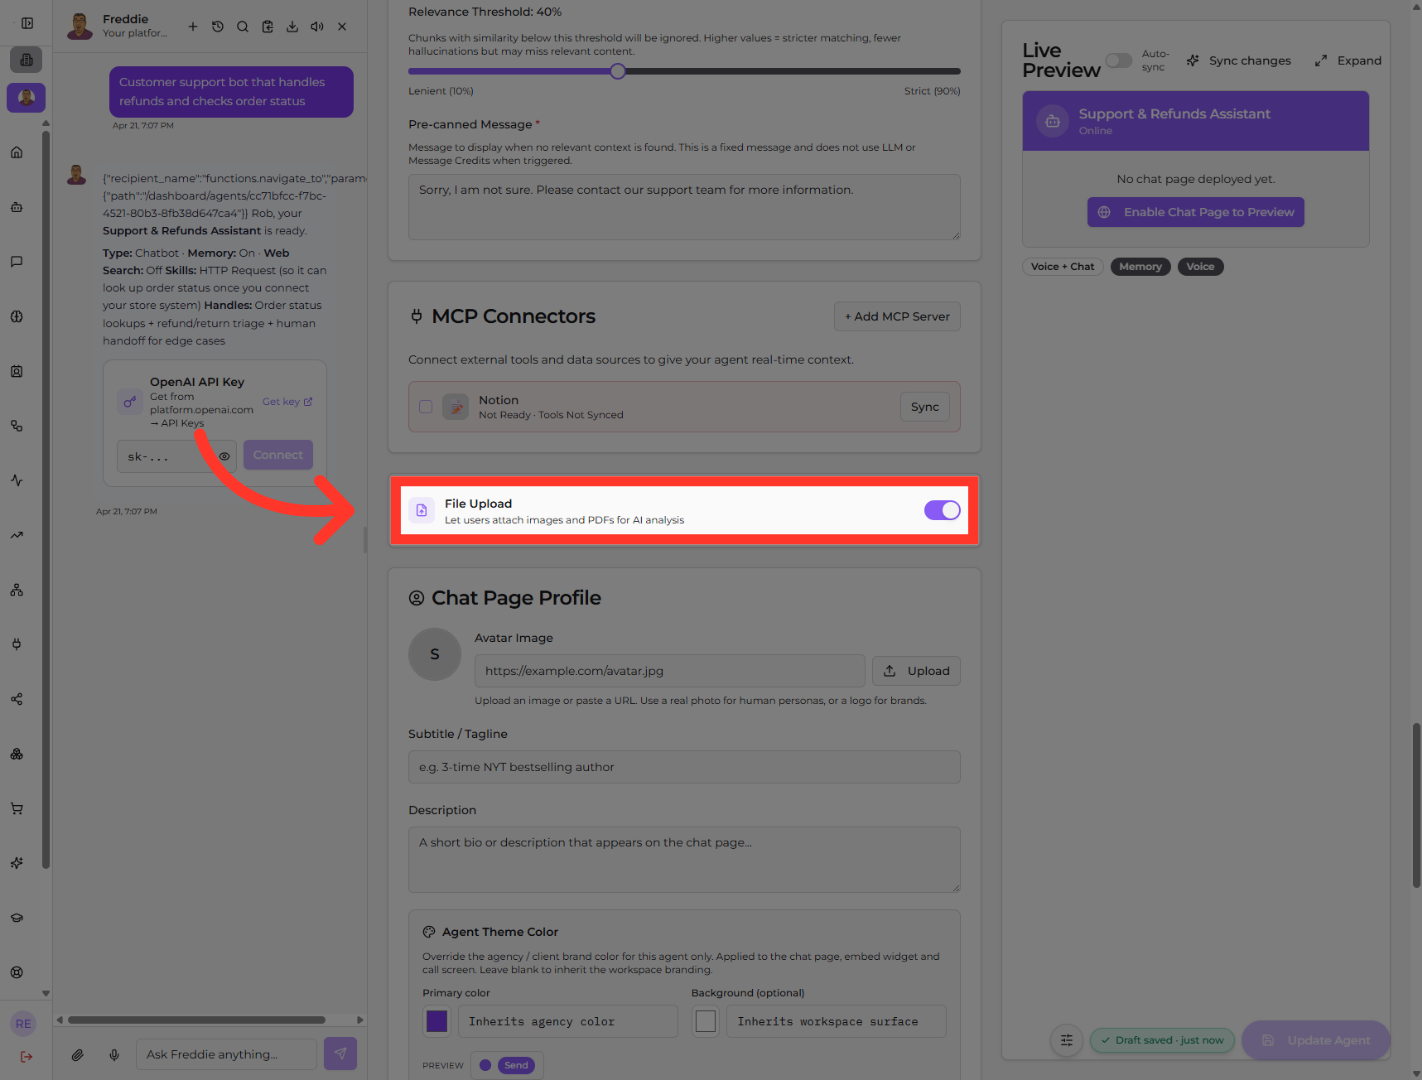
"Toggle 'File Upload' on. This lets visitors attach images and PDFs right in the chat for your agent to read and analyze — great for support tickets or document questions."
27. Upload Avatar Image
"Now let's style the public face of your agent. In Chat Page Profile, add an avatar image by pasting a URL or uploading one, then fill in a subtitle and short description so your chat page feels polished and personal."

28. Enable Customer Queries
"Scroll down to add Suggested Questions — clickable prompts like 'Where's my order?' that help visitors start talking. You can also turn on Chat Summary Email, so the agent naturally asks for an email and sends a recap after the session ends."

29. Open Identity Verification
"Near the bottom, find Identity Verification. Clicking here lets you apply for a verified badge on your agent's public chat page — a nice trust signal that shows visitors your agent is legit."

30. Apply for Verified Badge
"Once you're happy with everything, click the 'Update Agent' button in the top right. This saves all your changes and pushes them live. Don't skip this — it's what makes everything stick."

"And that's the full configuration. You customized the personality, locked in safety rules, picked your AI model and voice, connected knowledge and tools, and polished the chat page. Your voice-and-chat agent is now tuned and ready to deliver great customer support. Take a moment to test it, and you're good to go. Awesome work."
Still need help? Ask the team