Create And Manage API Keys In HeyGen Settings
Want to connect HeyGen to your own app or an automation? You'll need an API key first. Stick with me and you'll have one created and copied in just a couple of minutes. Think of your API key as the password your software uses to talk to HeyGen. Every request carries it, so HeyGen knows it's really you. We'll create one, pick a usage type, and copy it somewhere safe — because HeyGen only shows you the full key once.
Written By Fred Yalmeh
Last updated 2 months ago
Go to app.heygen.com
1. Introduction
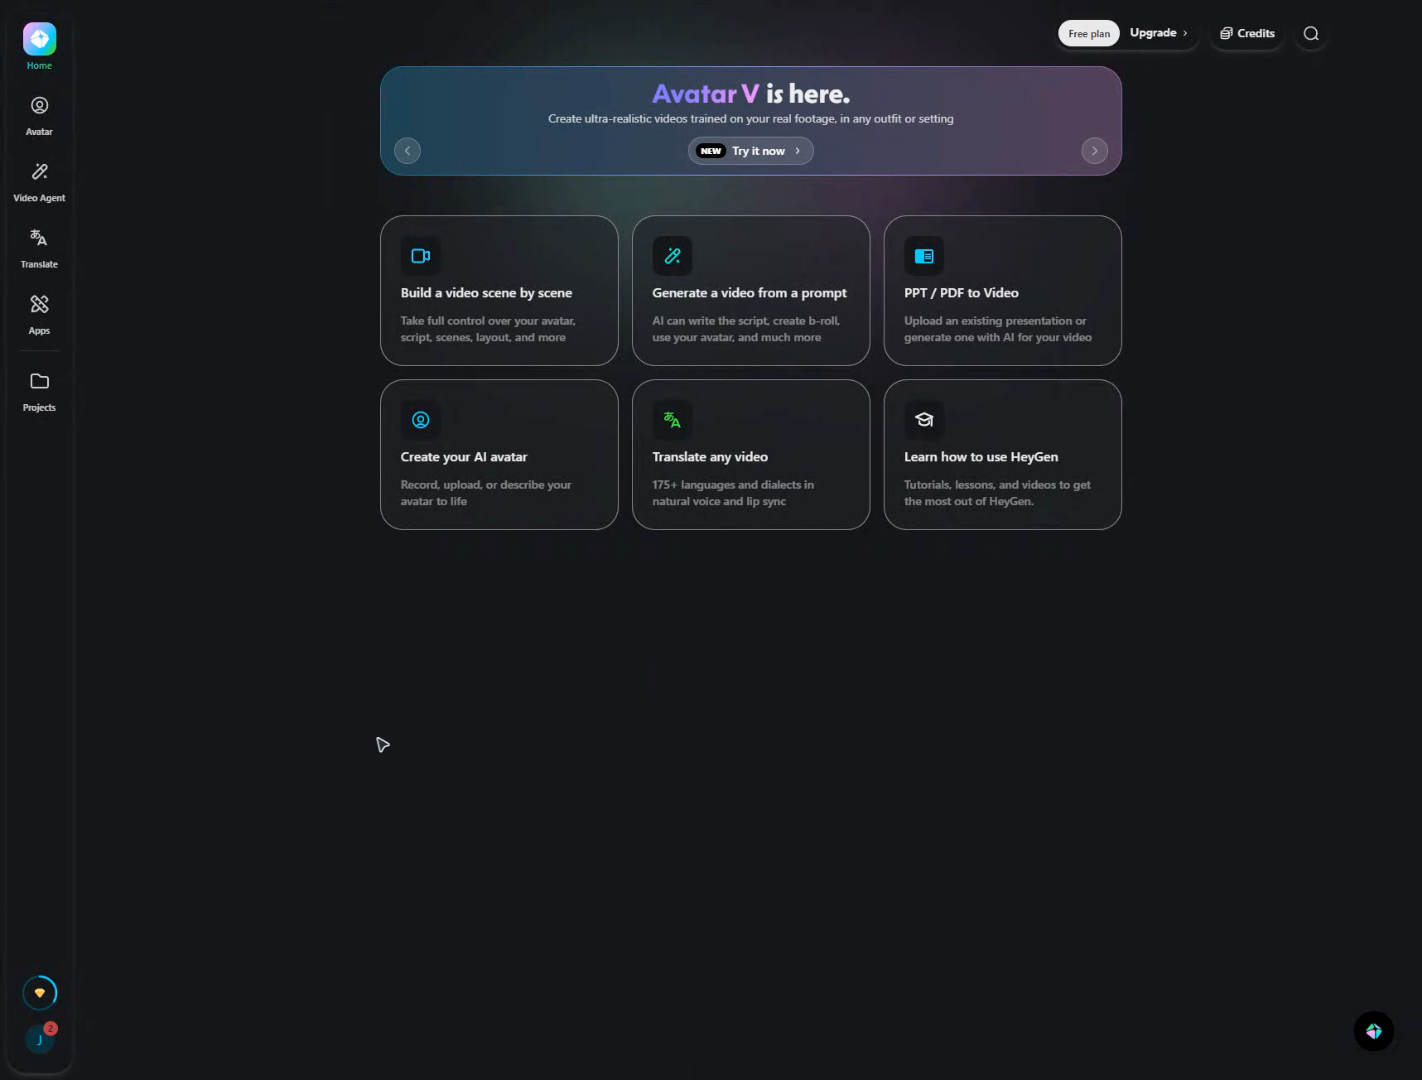
Let's start on your HeyGen home dashboard. Sign in at app.heygen.com first. Once you're in, look down at the bottom of the left sidebar. That's where the API dashboard lives.
2. Access API Dashboard
Now click "API dashboard." This opens the API management section in HeyGen, where you'll create and manage all your keys.

3. Skip Initial Setup
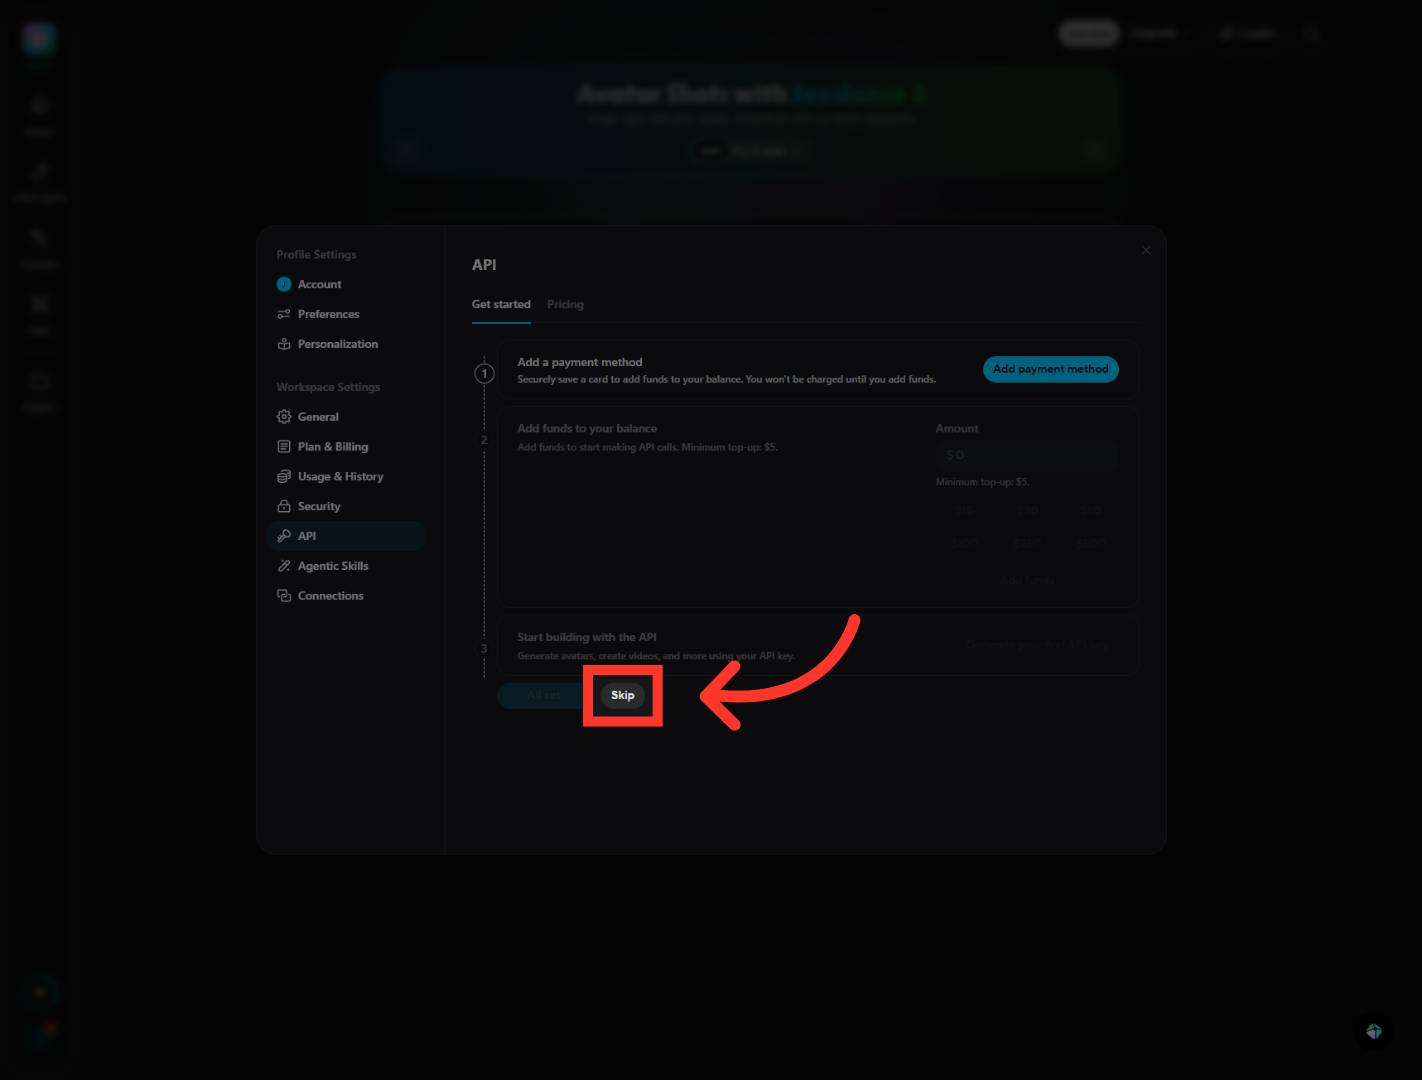
HeyGen may first ask you to add a payment method and load some funds. You don't need to do that just to create a key. So go ahead and click "Skip" to bypass the initial setup and jump to API key management.
4. Initiate API Key Creation
You're now on the API overview. Because this is your first key, you'll see a "No API Keys" message. Click the blue "Create API Key" button to start generating a new one.

5. Select Developer Usage
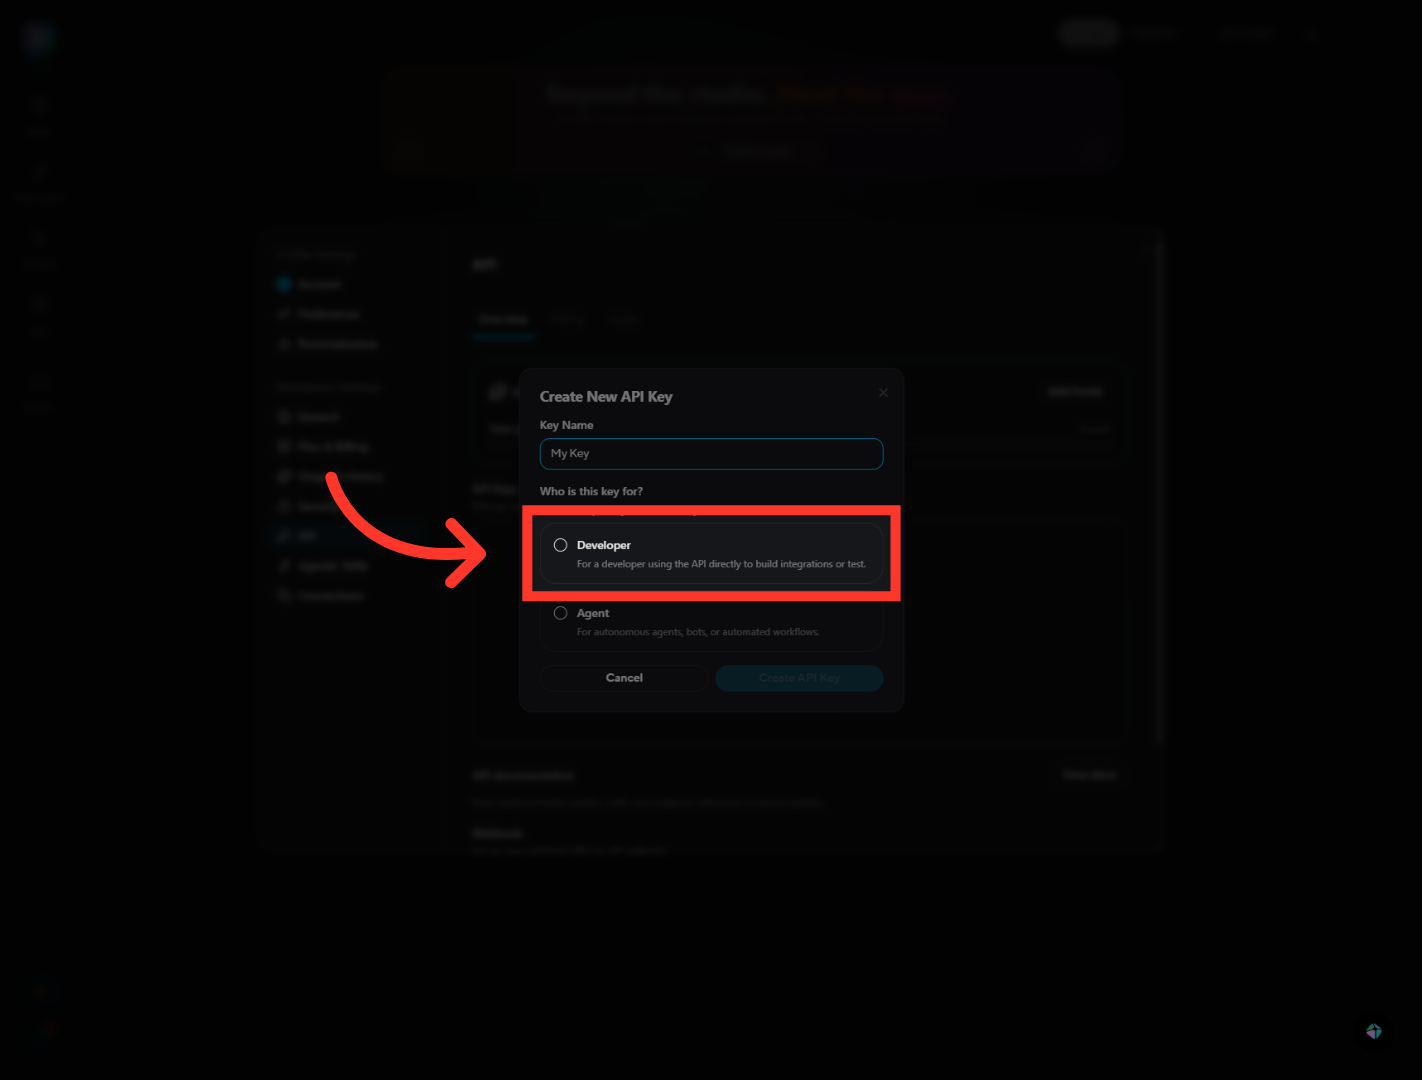
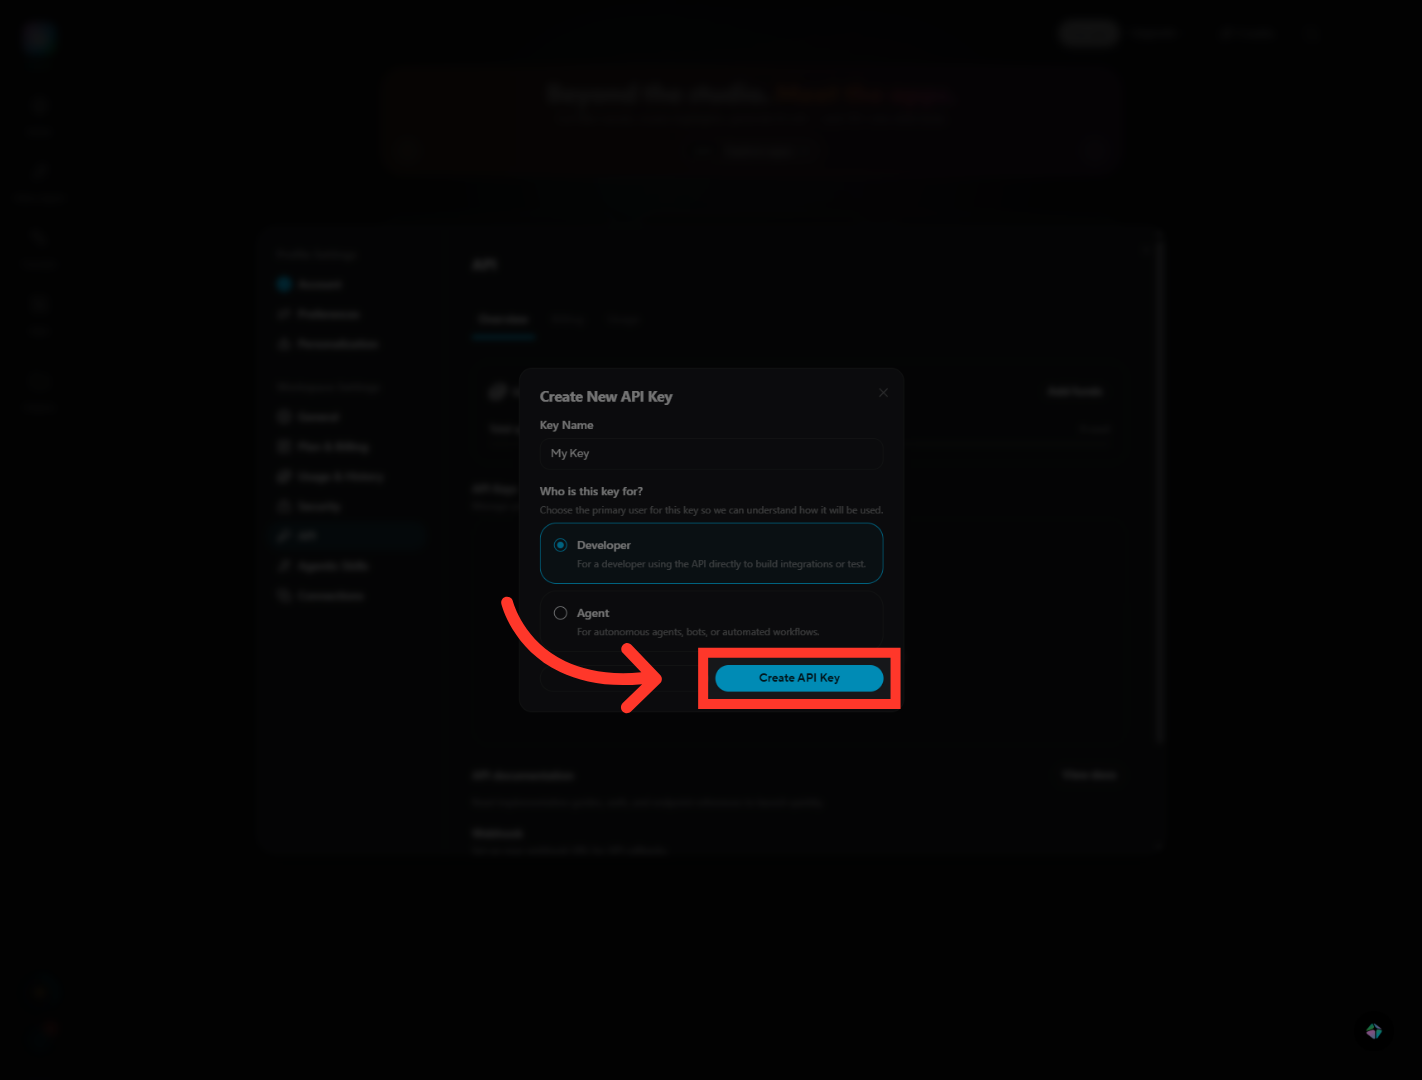
A dialog pops up asking who this key is for. The first option is "Developer." Pick this one if you're a developer using the API directly to build integrations or test things out yourself.
6. Choose Autonomous Agent Usage
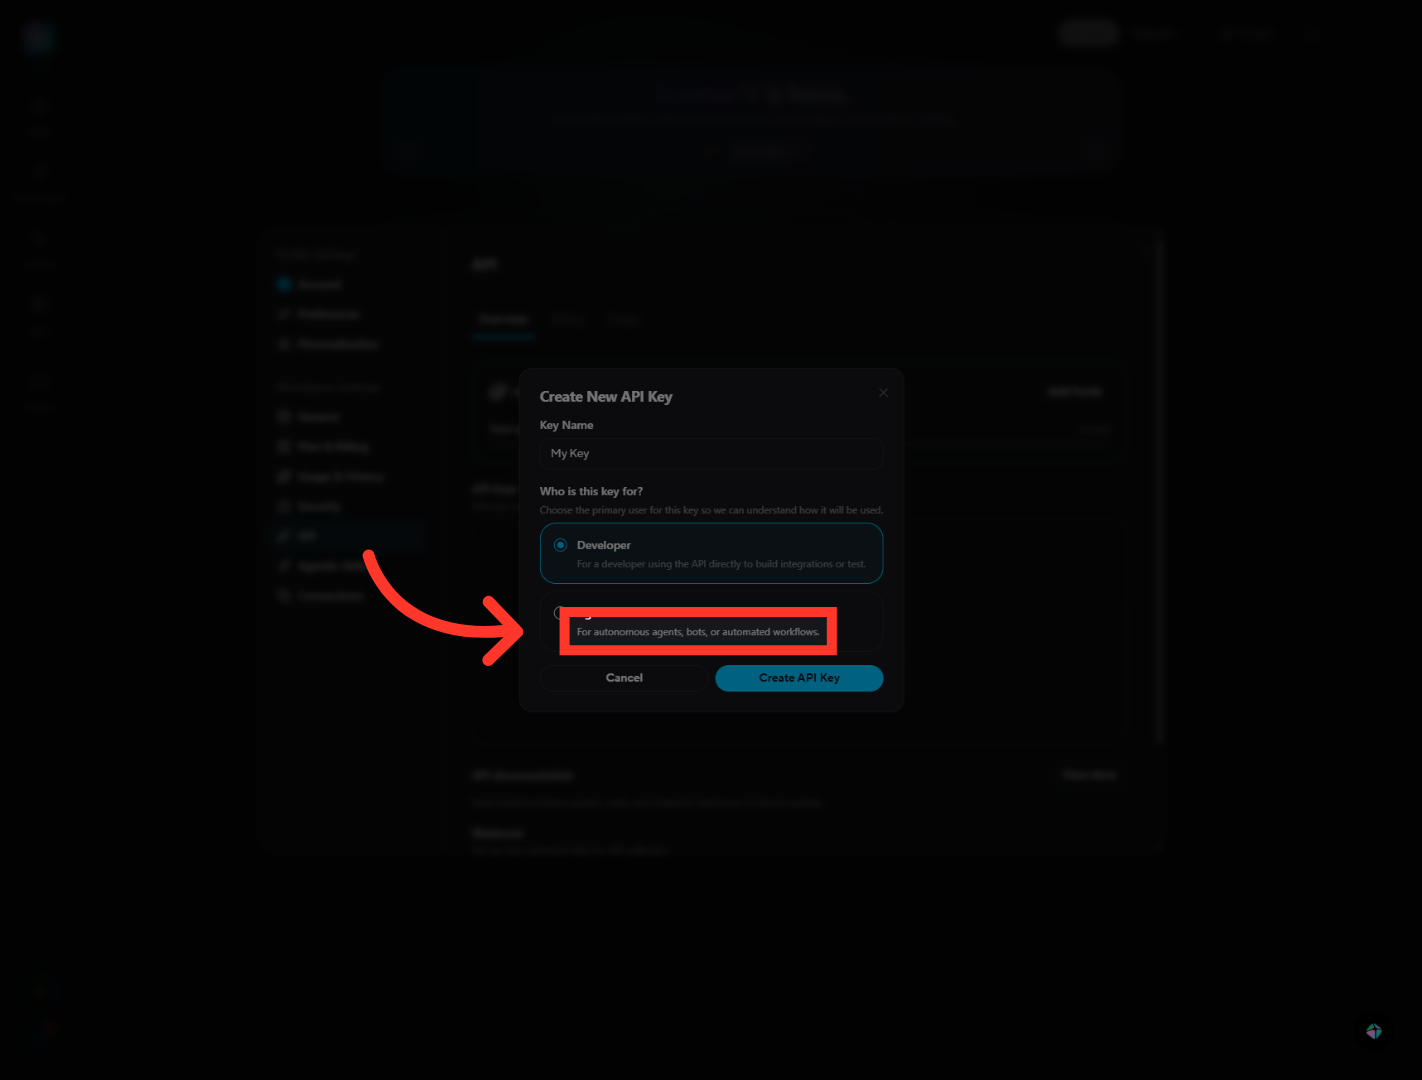
The second option is "Agent." Choose this one if the key is for autonomous agents, bots, or automated workflows. This tells HeyGen the key will be used for hands-off, automated processes.
7. Create API Key
Once your name and usage type are set, click "Create API Key." HeyGen generates the key instantly with the settings you chose.
8. Proceed With Action
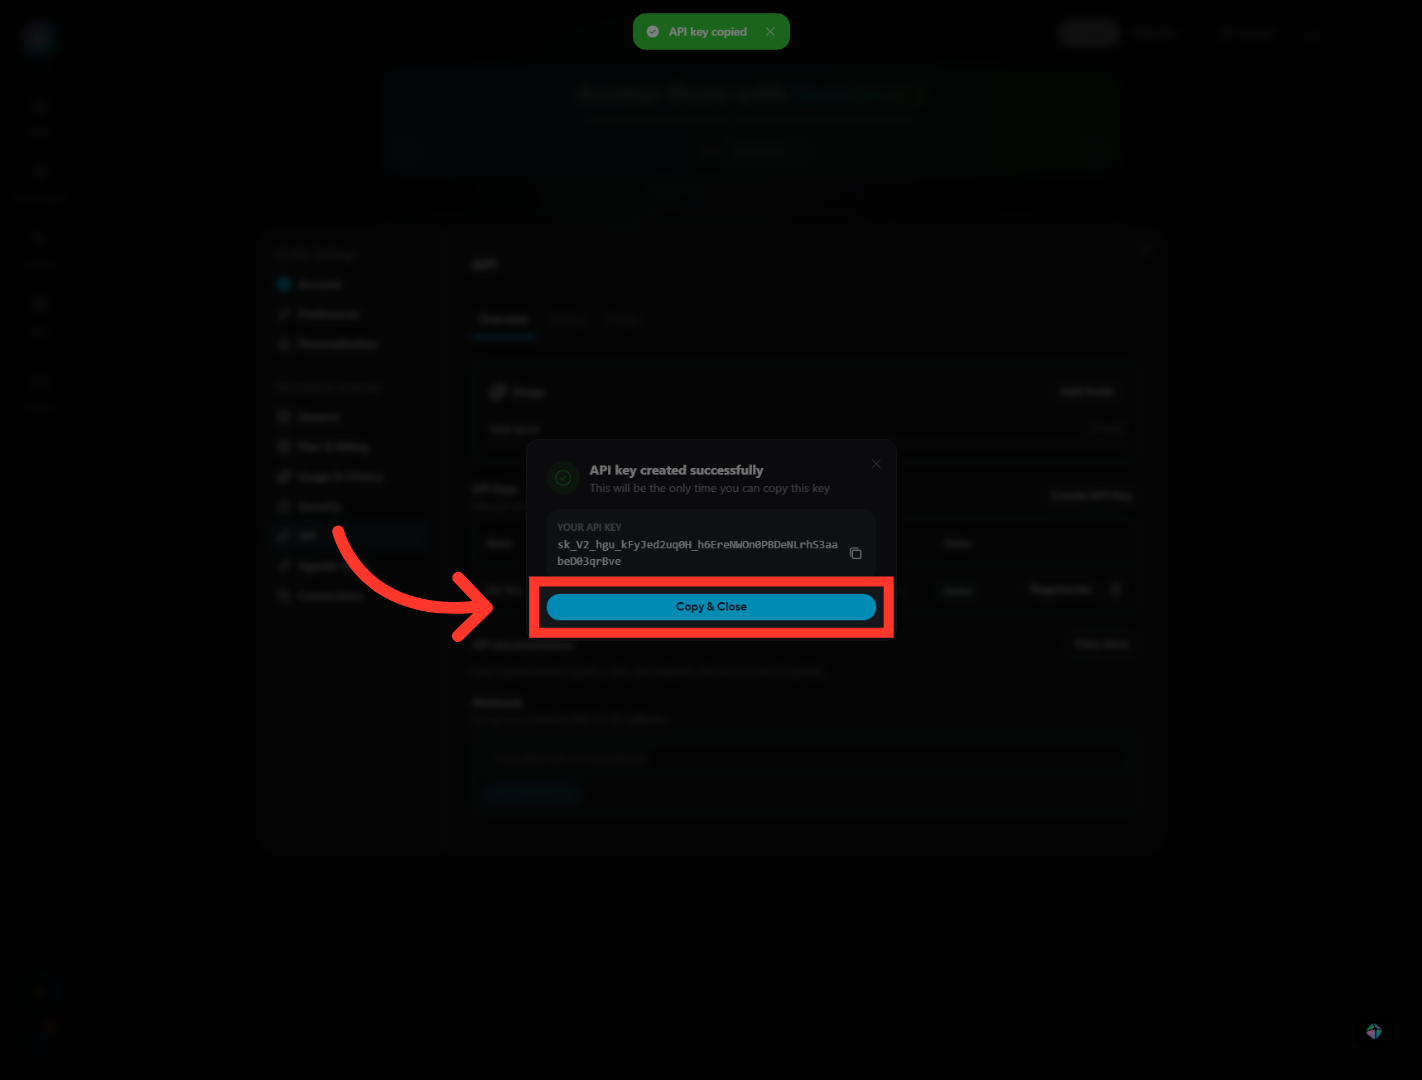
Your key is ready. You'll see an "API key created successfully" message with the key shown right here. Click the copy icon to grab the key and continue.

9. Copy And Close API Key
Finally, click "Copy & Close." This copies the generated key to your clipboard and closes the dialog in one move. Now paste it somewhere safe right away, like a password manager or your project's environment variables.
And that's it. You've opened the API dashboard, created a key, picked the right usage type, and copied it safely. You're all set to connect HeyGen to your app, your automation, or your NexaEra agent. Happy building, and I'll catch you in the next one.
Still need help? Ask the team